Showing posts with label AOS. Show all posts

Tuesday, 8 October 2019

#186: War in the West Game 3 - Legion of Azgorh Vs. Legion of Grief

Having clawed my way back up to the middle tables, I really wanted to finish Day 1 on a high. I was facing Cal for my third game, who is a regular around the scene, but someone I'd never actually played.

And Cal was running the new Death trickery, Legion of Grief!
Now, I'll be honest. At the time of playing this game, I had read absolutely nothing on Legion of Grief. I didn't know their rules, didn't know their tricks and had only half an idea what to expect. I was familiar with the warscrolls, and I figured outside of that, things couldn't get too crazy, right?

The scenario was Knife to the Heart, so I was going to have to be careful of all of his flying, retreating and charging infantry that could easily get deep into my backfield if I positioned poorly. 
Cal outdropped me and gave me first turn, which I was pretty conservative with. He had a unit of Bladegheists in the grave, so I really didn't want to get too ambitious until he'd played his hand. One thing I always catch myself doing is just diving in at the first opportunity, and so I've been using a little more self control than I typically would. Especially in Knife to the Heart, it's incredibly important not to over-extend. My first turn involved a couple of spell attempts which were shut down, and some shuffling of warhounds and Taur'ruks. I wanted to use the house in the centre of the board to anchor my forces. Hopefully, Cal would commit to an assault on one side, and I could focus my shooting and combat prowess.
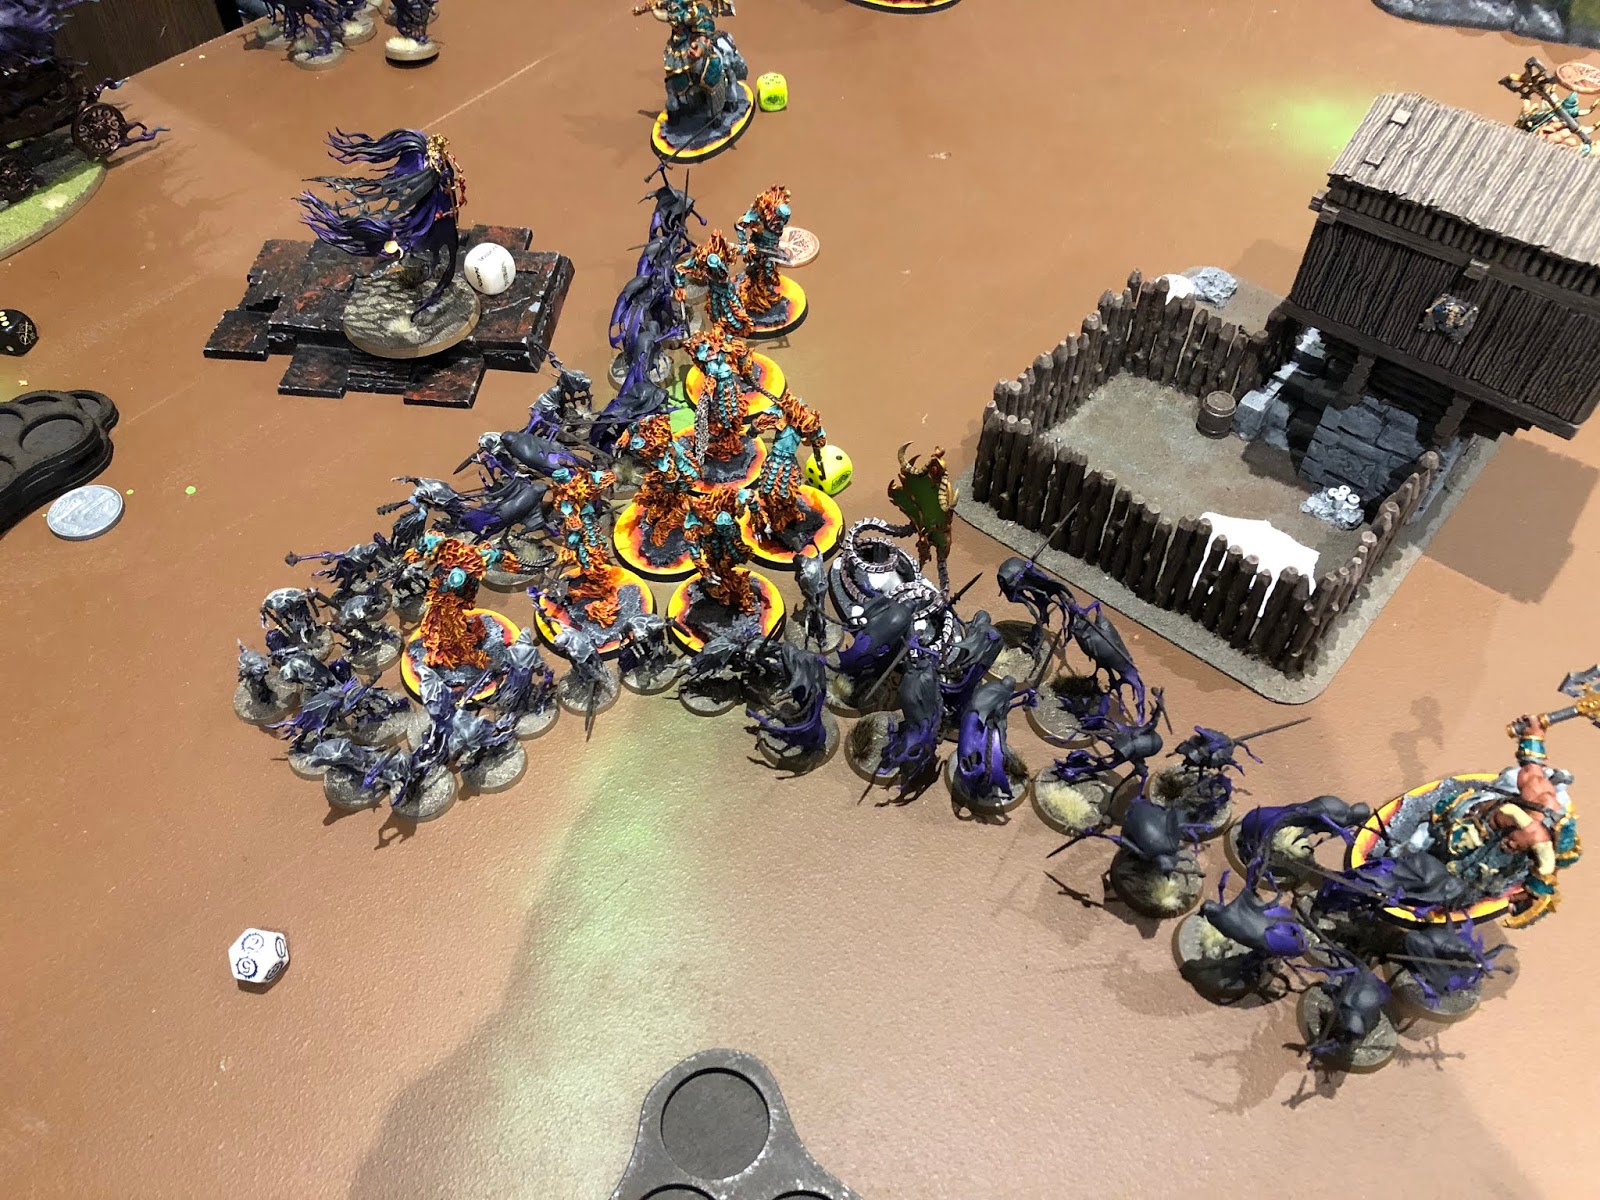
Cal wasted zero time getting stuck into combat! Mannfred, a unit of Dire Wolves and the Bladegheists from the Grave launched an all out attack on my left line, slamming into the screen of hounds with the highest hopes of carving their way to victory. 

But, as always, Mannfred had to go ruin everything! 

Before anything happened, the Epitome took its toll, luring the Dire Wolves and Blades into swinging last. Then Manny activated first with a single job to do. Clear the screen of warhounds, so that the Bladegheists could reach the K'Daai with their ton of attacks and start denting things. The hounds are a single wound each with a truly mediocre save. So, surely a couple of dogs would pose no issue to a militant Mortarch of Nagash? Apparently, not.

He inflicted five wounds. I took those five casualties from directly in front of him, which had a two-fold purpose. Firstly, it meant that his Blades were hitting the rest of the dogs because they couldn't reach over the top to hit the Fireborn. And secondly, it left space in front of Mannfred for my two Taur'ruks to pile in and start swinging! 

My Warhounds, K'Daai, and Taur'ruks all played their part in dishing out some horrific damage, and when the dust settled, Manny was dead and the Blades were dead. My surviving Warhounds fled to battleshock, but they'd more than earned a break from battle!
On the other side of the table, the Black Coach had slammed into my other screen of dogs and just deleted them. Some Dire Wolves also joined the conflict but made the small error of dragging my third Taur'ruk into the fray, and he wasted zero time in caving in some heads! I was concerned about the Coach being left unchecked, and knew I needed to deal with it, but all in all, I was happy with how turn one had gone. 

Cal won turn two, but having had his plans rattled by the death of Manny, it was a bit of a cagey turn. The Black Coach continued its rampage toward my objective, trampling an entire unit of Fireglaives beneath its hooves, while the K'Daai absolutely mashed the five Dire Wolves left to hold the front line. Aside from that, the Chainrasps floated forward, protecting Olynder as they went. Even with the damage I'd already caused, I knew I had a LOT of bodies still to kill if I wanted to claim that objective.
I knew that it was time for decisive action (after just harping on about showing restraint and biding my time, right?!). The Epitome and K'Daai cut a burning path straight through the middle of the board, making their intentions clear to the Chainrasps that they were ready to brawl. I left a Taur'ruk between the Bladeghiests and my objective and left him there in interception duty. I didn't particularly want to engage that unit if I didn't have to, and unless I found myself on the raw end of a double turn, they weren't an immediate threat. Besides, if I put enough pressure on Cal's objective, he wouldn't be thinking about mine.

The Skullcracker and a Taur'ruk got ready to slam into the other end of the unit to lock it in place, while thirty riflemen loaded their rifles to blow holes in the Coach. Against all odds, my Skullcracker (who was crucial to chew through the sheer numbers of the Chainrasps) failed a re-rollable 3" charge.

Snake Eyes...

Twice... 

They say when it rains it pours. I fired thirty Fireglaives into the Coach and backed it up with a Taur'ruk charging in. Alive on one wound. If I'd remembered Burning Skies AT ALL in this game, it would have been OK, but I forget that rule four out of five games, much to my detriment.
So began an all out scuffle in Cal's half of the board. The whole unit of Fireborn got to attack, and hitting hordes of single wound models with a 5+ save is where they want to be! I took a hefty toll on them, but a command point from Olynder prevented them from crumbling too much.
From there, the combat just escalated. The Blades charged in, intent on killing the Taur'ruk and Epitome, but with no luck. The K'Daai kept on brawling, slowly losing numbers through weight of attacks, but no where near at the speed that the Chainrasps were! The models lost from the Chainrasps had left the other Taur'ruk out of combat, but now unrestricted and free to charge down Olynder! It was his moment for greatness! 

 In my turn, I dropped the hammer. I had plenty of command points in the pocket, and so my K'Daai and Epitome both retreated from combat, flying over the top of the ghosts to the now exposed objective that was only being held by the back corner of a depleted Chainrasp Horde! I ran the Taur'ruk around Olynder (cowardly, but for the greater good!) to stack another body on. I had just enough manpower to lay claim to the objective and take the game for a Major Victory. 

This game really confirmed for me that the Epitome is hands down the best ally I could fit in the army. So much utility, and a constant source of pain and grief for my foes! The Skullcracker was a complete potato this game, but lucky for him, the rest of the army pulled its weight. Triple Taur'ruk also proved their worth this game, despite their high rend being completely irrelevant for the most part.

Cal was a gent and a sportsman, and it was a great game to finish Day 1 on! I was sitting tight on 2 wins and 1 loss, and I was happy with my play heading into Day 2.

Little did I know, Game Four would be a game I'd not soon forget! 

Thanks for reading,
Gabe

Sunday, 7 April 2019

#169: Legion of Azgorh Tournament Army List Breakdown

With the Australian Championship Heat 1 behind me, (I'm slowly learning that it may be ill-advised to explain all of my tricks and weaknesses BEFORE an event) I thought I'd go into depth on my army list, why I chose the units that I chose, and how they performed compared to how I expected them to perform. As the battle reports come out, I'll also touch on different aspects of the army, as well as what worked and what didn't

So, why Chaos Dwarfs, firstly.

There's no question that Chaos Dwarfs are among the rarest armies around (mostly due to price and ease of access), and usually if you don't see an army lots, it's a pretty good indicator that it's not great; not always, but generally. But after reading over the... *sigh*... PDF (my gaming group will remind me every fifteen minutes or so that it's not actually a Battletome), I started seeing a lot of units that I liked the look of, and a playstyle that sounded like a hell of a lot of fun! The more I looked into the army, the more interested I became, and after picking up a whole shoebox of Forgeworld goodness, I was committed. I began ordering, building and painting, spending hours and hours painstakingly putting all of those resin models together to try and form a cohesive army.

And here's what I came up with.

Allegiance: Legion of Azgorh

Leaders:
Bull Centaur Taur'ruk
 - General
 - Trait: Grotesque
 - Artefact: Armour of Bazherak the Cruel
Daemonsmith
 - Darkforged Weapon
Chaos Sorcerer Lord
 - Mount: Steed
 - Runestaff
 - Allies

Battleline:
10 Infernal Guard Fireglaives
20 Infernal Guard Fireglaives

Units:
12 K'Daai Fireborn
10 Chaos Warhounds
 - Allies
10 Chaos Warhounds
 - Allies

War Machines:
Magma Cannon
Magma Cannon
Skullcracker War Engine

Total: 1940
Extra Command Points: 1
Allies: 320/400
Wounds: 136

So, let's break this all down. We'll start with Battleline. For me, the Fireglaives are by far the best Battleline in the army, because while they're as slow as Ironsworn, they can interact with models up to 20" away, and can kick out an alarming amount of ranged damage. Even doing mortal wounds on unmodified 6's is a huge deal, as it bypasses any number of the negative To Hit modifiers out there. This allows you to put some hurt on a pesky hero that thinks they're safe. In a game where bodies hold objectives, I knew that I needed plenty of boots on the ground. I didn't want to go "horde", so a 20-man unit and two 10-man units gave me three units to use as utility models depending on the scenario. If I needed screens or objective campers, they could do that while still dishing out the damage.

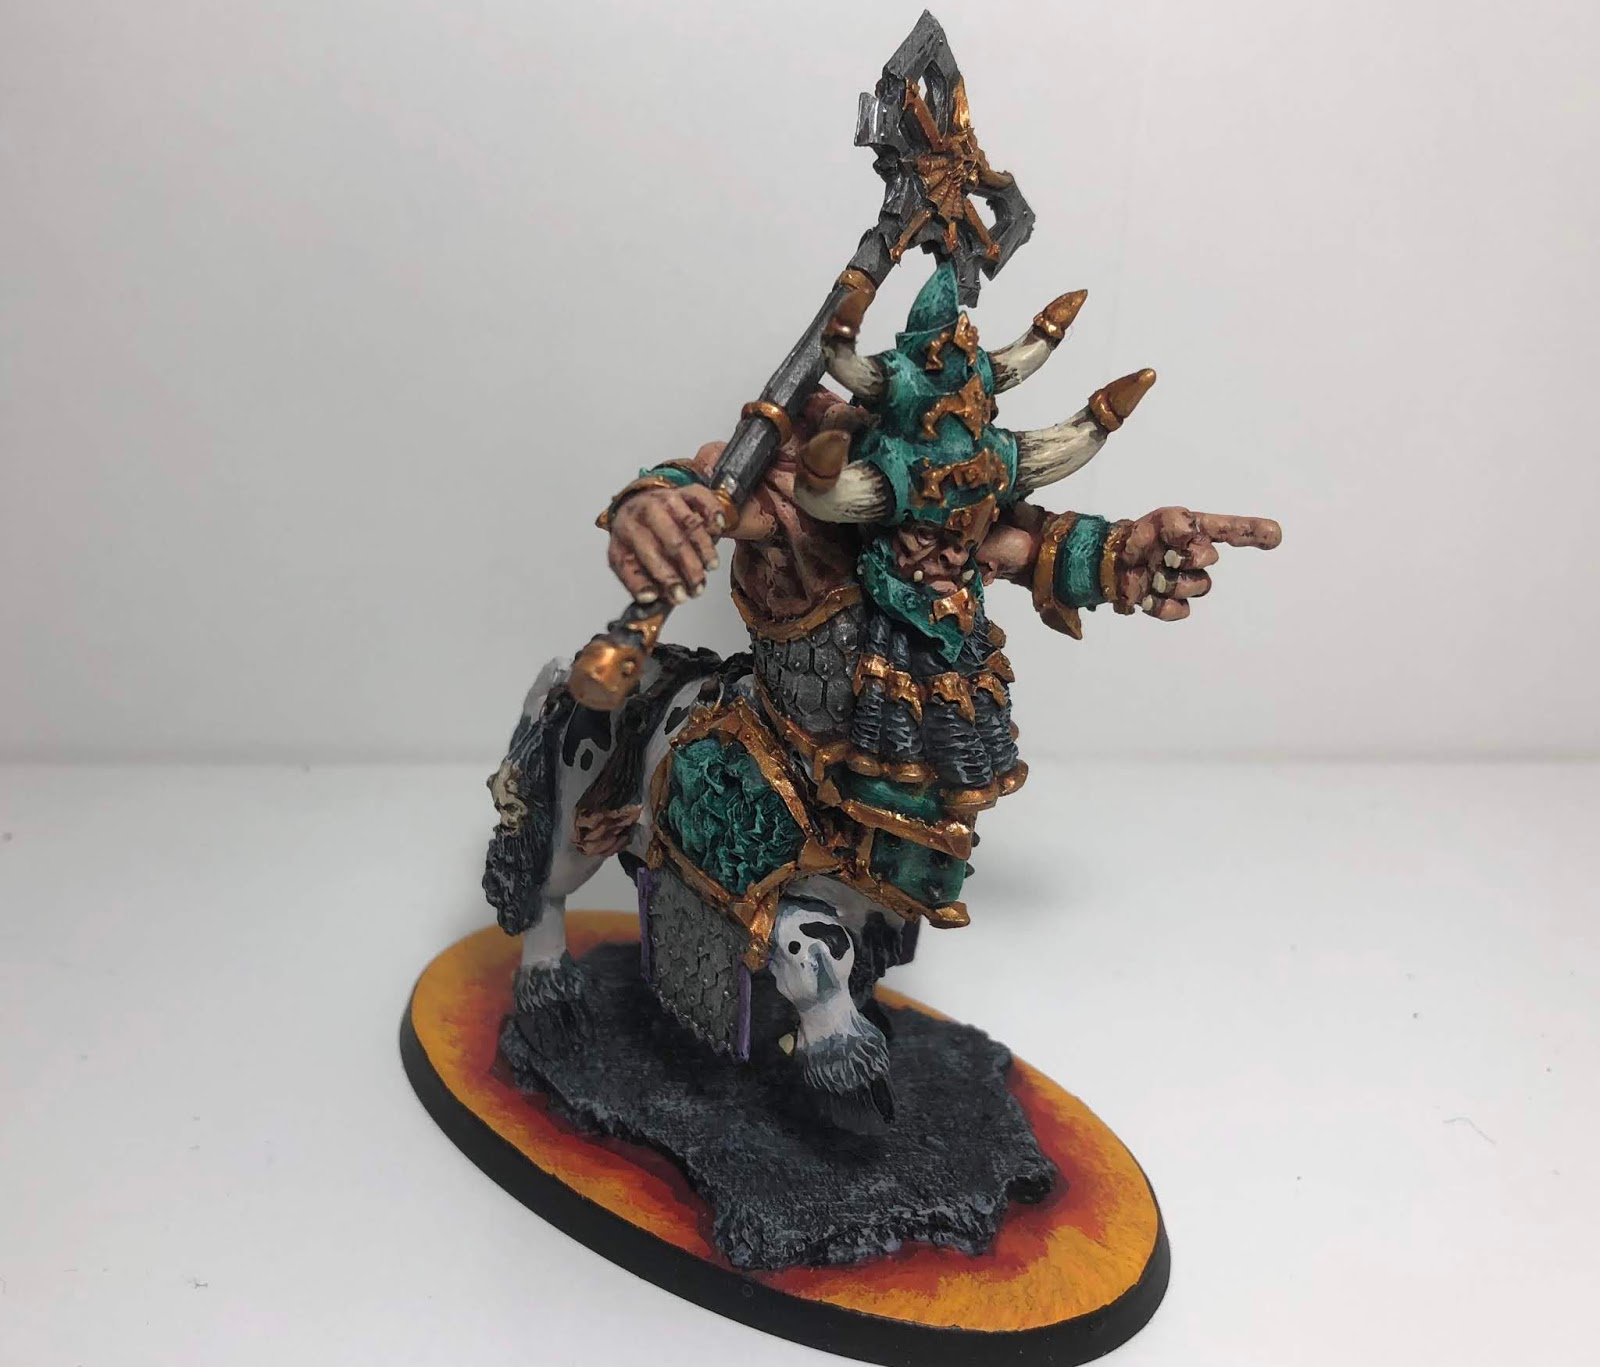
With Battleline sorted, I moved on to Heroes. The Taur'ruk is an easy choice as he's currently very cheap for what he can do. Five Rend -2 Damage 3 attacks will put the hurt on most things, and between Grotesque (-1 to hit in combat), the artefact that gives him a 5++ and Blackshard armour (ignore the first would of each shooting and combat phase), he can prove infuriatingly tough to bring down. All hail the Dairy Queen! 

With only one artefact, my other two Heroes were both very deliberately chosen because they're wizards. With missions being what they are, I wanted to be able to compete in all of them, and so a Daemonsmith and an allies Chaos Sorcerer Lord on Steed made it in. The Daemonsmith is great for 100 points, buffing war machines, lobbing grenades and having one of the best warscroll spells in the game. 


The Chaos Sorcerer Lord was chosen because he's fast on a Steed, and because his spell is a great force multiplier. Both of these factors came into consideration because of my next unit.

12 K'Daai Fireborn

At 480 points for 12, these have fast become a staple in literally every list I write. They off a relatively slow army a fast, running and charging sledgehammer unit with enough bodies, wounds and damage output to clear an objective and score it for themselves. 3" reach on their 60 attacks (each doing D3 damage) means that, in most cases, the whole unit is attacking, and whatever they hit is gonna feel it. The Sorcerer Lord's Daemonic Power spell just makes them better again, giving them precious re-rolls. If the spell doesn't go off, I've always got Oracular Visions in the pocket. Otherwise, it typically gets put on another unit that I need to keep alive. The Sorc Lord also plays the vital role of fast-moving babysitter, able to keep up with the K'Daai and use CP to either get them moving faster with runs, re-roll botched charges or mitigate their mediocre Bravery 6 when things go south. It's like the two were made for each other.

The one thing that the K'Daai lack is any kind of Rend. And while the Taur'ruk offers me some high-quality attacks, I really wanted a hammer piece that I could launch into people and reliably dish out carnage. The Skullcracker War Engine was too good to pass up for 200 points, churning out 4D6 attacks on it's main profile (because, let's be honest here... we're overcharging that engine each and every turn), as well as having decent move and a great save! The challenge I faced was that the model is no longer in production, so I decided the employ the skills of one very talented Blake Kerwick to create me an infernal machine worthy of the legion.
While it's not really a train as such, it's definitely a War Engine, it's definitely imposing, and it doesn't offer me any advantages through modelling. In fact, he's 100% impossible to hide, so he's getting shot up and blasted with magic no matter where he stands (which is ideally deep in enemy lines) He also gives me a nice centrepiece for the army! 

With points starting to run out, I simply couldn't resist the idea of my Daemonsmith babysitting two Magma Cannons. They are hands down one of the scariest artillery pieces in the game. People can handle being shot at with Ballistas. People reeeaaally don't like their -2 to shoot heroes catching a jet of lava from 24" away that ends up doing six flat mortal wounds! I like the magma cannons because there's only one chance of failure. There's no hit or wound roll, and most of the time, your opponent doesn't have an opportunity to stop it either. It doesn't care about modifiers and it doesn't care about shiny armour. All it cares about is turning that Lord- Castellant into a flame-grilled steak from across the board.  
One of my last purchases that I personally believe is essential, either by way of a Battalion or by paying points for it, is a spare command point. This is especially true when it comes to this army, specifically with K'Daai. They have average bravery, but a hefty price tag, and the last thing I want is to take a heap of damage from an alpha strike, and watch the unit melt. Some armies can get away without CP in the first turn, but I don't like to risk it. 

With only 170 points left, I turned once again to the Allies pool, and started flicking through warscrolls available to me, looking for a unit that did something that my army didn't already.

Speed and cheap bodies.

And that's when I settled on the humble Chaos Warhound. With a 6+ save and Bravery 4, they are the definition of sub-par, but they're cheap, expendable, insanely fast (at least by Dwarf standards) and give me 20 bodies that I can willingly put in harm's way in order to protect my far more valuable elements. Having 20 bodies with a decent footprint and a 16" run move plays a huge part in objective play, and also gets in the way of your opponent's perfectly planned offensive push that would otherwise be slamming into your Fireglaives. They were a bit of a left field choice, but turned out to play a huge part in board control and objective play. 

So, now that I've gone over the units, lets talk about the elephant in the room. This is a 12-drop army. The decision on who goes first is never going to be in my hands, realistically. And I'm OK with that. I think that unless you can get under 4-5 drops, it's not worth worrying about, and you should instead have contingencies in your army that have an effective turn one, regardless of who goes first. I got to the point where I had about 9-10 drops, and I just stopped caring, instead choosing to just take the units that I really wanted in the army. It ended up not even being an issue at the Heat 1 anyway, as the highest drop army I faced was 6. I just chose not to stress about that. I see that decision of who takes first turn as another opportunity for my opponent to make a mistake. Because my army has such a blend of bodies, speed, shooting and combat, it allows me to at least try and salvage a bad situation, and capitalise on a good one early in the game. 

The army as a whole is quite resilient, thanks to decent saves on even my foot soldiers, and Blackshard Armour, which doesn't sound that impactful on paper, but has huge ramifications. I have enough units that I felt like I could react in both deployment (as I would be able to see where my hammers, heroes or artillery were going to be most impactful) and in the movement phase itself. The Taur'ruk often played the role of either tanking a unit that I didn't want hitting my riflemen, or assassinating an important target. The Skullcracker on a 3+ save, often with Visions on him from the Sorc Lord, was tough as nails, and racked up quite the kill count over the weekend.

And I cannot speak highly enough of the big unit of K'Daai. When you move the unit with purpose and support, using charges and pile-ins to traverse the board, planning turns ahead about where you want them to be, it has such a catastrophic impact on your opponent's army that it can swing the flow of an entire battle. Their 3" reach also means that the unit can string out and hit 3-4 enemy units without sacrificing any attacks. Even units behind screens aren't safe, unless the opposing general is particularly savvy with his model placement. They are the heart and soul of the army, and have rightfully earned their place in my list with blood.

Lots and lots of blood. 

So, there you have it. That's the army that I took to Heat 1, and managed to land 2nd place! I'll be posting up all five battle reports from the event over the next little while, so keep an eye out for that!

Until next time, thanks for reading.

Gabe

Sunday, 1 July 2018

#135: Legion of Azgorh Compendium Review...

Evening, all.

It's no secret that I'm a big fan of the Chaos Grand Alliance. There's plenty of flexibility, there's a unit for almost every role and there are enough Battletomes to keep them current and competitive (for the most part... poor Skaven). But while most armies see the tabletop every now and then, regardless of how obscure, we're here to talk about the rarest army in the entire game.

The Legion of Azgorh.

That's right, in case you've been living under a rock, or perhaps just missed it in the onslaught of information and releases leading up to AOS2 and beyond, Choas Dwarves got an update. And what an update it was! 

In a pseudo-Battletome release, Forgeworld dropped a PDF (which can be found for free on the Forge World website) with updated scrolls, as well as brand spankin' new allegiance abilities, artefacts and warscroll battalions! And because Duardin aligned with Chaos are clearly the coolest Duardin in all the realms, I'm here to break this PDF down and talk about what's good, whats changed, and why they're a viable competitive army in the current meta. Yep, I said it. I think these guys are poised to kick some ass and take some names.

While I will refer to the older scrolls occasionally, this is not going to be a direct comparison back, as it's not really relevant what they used to do. We live in the now!

ALLEGIANCE ABILITIES:

We'll kick things off with the Allegiance Abilities, as that's the lens through which we'll inspect the rest of the army. The first rule is Blackshard Armour. This used to only affect the infantry and characters, and gave you a re-roll of 1's to saves against shooting; not bad, but hardly game-changing. Well, hold onto your pants, because this has all changed. Every unit in the army, every hero, every war machine has Blackshard Armour now, and here's what it does. A model with this armour can ignore the first wound they suffer in the shooting phase, as well as the first wound they suffer in the combat phase. This would be a solid artefact for any other army, and Chaos Dwarfs get it on every single unit. Wow! While it doesn't sound like much, that's a ton of damage mitigation. There's just a heap of wounds that will be inflicted, that make it past armour saves, that will be ignored. Yes please. 

The second battle trait is Burning Skies. This is a little more situational, as some armies will be largely unaffected, but it's a handy little board control ability. If an enemy unit with the Fly rule moves more than 6", there's a decent chance they'll be copping some volcanic mortal wounds to the face. This probably won't win you the game, but mortal wounds are mortal wounds, and flying units are usually pretty high-value targets. This will be particularly annoying for Nighthaunt, who's speed and army-wide Fly ability will make them second guess how aggressive they want to be. 

Every Legion of Azgorh wizard also knows the Fireball spell. In the light of Arcane Bolt's tone-down, this spell is brutal. If it's a single model, you're going to chip a mortal wound off it. However, the bigger the unit, the more poor fools get caught in the ensuing inferno. If the target has ten or more models (so, a lot of units...), it's eating D6 mortal wounds! Brutal. Oh, and it only casts on a 5, so there's now very little incentive to ever cast Mystic Bolt. 

The army gets three new command traits to pick from. Contemptuous is a nice little re-roll for wounding, but there are other, more efficient ways to include this in your army, so it's a hard pass from me. Relentless gives you the chance to pile in and attack twice on a Hero or Monster, and while it's a little situational and requires some luck, a Taur'Ruk could get some use out of it. But hands down the best of the bunch is Grotesque; a flat -1 to hit in combat makes your general far more survivable than he already was with Look Out, Sir and Blackshard Armour. 

Lastly, there are three new artefacts and they're all good! Considering the battalions we'll be covering later in the article, it's likely you'll be taking at least two of these, so I'm glad there aren't really any duds. 

The Black Hammer of Hashut gives one weapon on the bearer re-rolls to hit. The more you hit, the more you kill, and with some pretty intimidating weapons on several heroes, this isn't at all bad. 

Then we have the Armour of Bazherek the Cruel, for when you absolutely, positively do not want your character to die. This artefact gives the bearer a 5+ wound negation that stops wounds AND mortal wounds; essentially a Nurgle save. Combine this with Grotesque and Blackshard Armour, and all of a sudden, it becomes REALLY hard to make wounds stick. You have to get past the hit modifier, past his save, past his artefact save at least twice, because the first one is going to be ignored by the Battle Trait. 

Lastly, and in my mind, the artefact you will see in absolutely every list, we have the Chalice of Blood and Darkness. It's a one use item, but when you do use it, get ready to drink the tears of enemy wizards. Every enemy wizard within 30' must roll a dice. On a 4+, they reduce the number of spells they can cast by one. It doesn't say "to a minimum of 1", so you can effectively turn single cast wizards off for a hero phase, and severely cripple more powerful wizards. In an age of endless spells, Spell Portals and Wizard Councils, this is a must-take in every single list. Not only will it shut down a large amount of magic coming at you, but also makes your opponent's dilemma of turning off your endless spells an excruciating decision.  

HEROES:

Legion of Azgorh is spoilt for choice when it comes to heroes, so lets break them down. 

Drazhoath the Ashen is first and foremost. If you ever wanted and angry wizard on a burning bull, do I have the scroll for you! Weighing in at 320 points (so, in the same bracket as Arkhan the Black), you get a 13-wound 4+ save model with a 5+ after-save that bounces mortal wounds. He can cast twice, unbind twice, can actually fight his way out of a soggy paper bag, has a so-so shooting attack and can move 15" a turn! Now, he can't fly (don't let the model's MASSIVE WINGS fool you!), so there's something to be said about leaving him enough room to actually have an impact on the game, but his signature spell is pretty solid. It casts on an 8+ (ouch), but does D6 mortal wounds at 18". Keeping in mind that he can cast twice, and already knows Fireball, he's actually a potentially lethal caster. To top it off, he has a command ability that lets units from his army ignore Battleshock while wholly within 24" of him. I think he's definitely worth his points, considering what he brings to the army. The army as whole is pretty CP-rich, and doesn't need to expend a lot, so the Battleshock bubble is incredibly good! And considering the range of the aura and the speed of Drazhoath, you're not often going to find units too isolated. 

The only other wizard available is the Daemonsmith. These angry bros are essential to the army, as they not only provide magical support, and carry important artefacts (cough*chalice*cough), they fill the role of engineer, buffing all of your war machines. If they've been wounded, they're better at unbinding, and they also carry a hand grenade, that'll be a nasty surprise for anyone who wanders too close to them. Their signature spell is also ridiculously good! With a measly casting value of 6+, Ash Storm has a whopping 36" range, and not only stops the target from running, but slaps a -1 To Hit modifier on them as well, building upon the sheer tenacity of your army. Intimidating ranged units will be at -2 to hit most of your heroes! Splendid. 

Continuing on with the Duardin side of things, the Infernal Guard Castellan fills the role of infantry captain. He's fairly straight down the line with his Warscroll. Five wounds, a decent save and low movement are all to be expected. He's actually pretty solid in combat, being able to really dish out some pain against other heroes of equal stature, but his Command Ability is quite cool. He can select an enemy unit (or more, if you have the CP) within 12", and you add 1 to all wound rolls against that unit. This doesn't stack on the one unit, but means you're going to be wounding more, and therefore killing more. The glaring problem with this is that you have to get your Castellan within 12" of a viable target. Easier said than done, when you consider he has a 4" move...

The last Duardin hero is the Battle Standard Bearer. This guy is the reason that Contemptuous is a questionable command trait. He carries the Black Banner of Malice, whic gives +1 Bravery to all units wholly within 18", as well as allowing those same units to re-roll wounds of 1 in combat. He's also fortunate enough to be able to walk around. The banner doesn't need to be planted in the ground and him stand still for it to work. He can follow the main battleline around at will. 

Moving over to the Bull Centaur heroes, we first have Shar'Tor the Executioner. He's 220 points, can't carry an artefact or have a command trait, but he's an absolute beat-stick in combat! With five high-quality attacks (-2 rend, damage 3), he's going to hurt someone, and hurt them badly! His command ability is great, too! All centaur units (himself and Taur'Ruks included) can re-roll charge distances and re-roll hits of 1 on their hooves, which go from damage 1 to damage D3 the turn they charge. This can make for a devastating assault! 

The generic character for centaurs is the Taur'Ruk. This guy is the foundation warscroll for making your tanky hero. He has the same high-quality profile as Shar'Tor, but can take the artefact armour and Grotesque. He's got one less wound and a less powerful CA than Shar'Tor, but he's also 60 points cheaper. Considering how hard he is to bring down, I think he's worth his points, especially in a Bull Centaur-heavy army! 

UNITS:

Let's start with the basic infantry. Infernal Guard Ironsworn are really, really good. While they have the standard dwarf problem of 4" move, the musician gives them bonuses to run, and the banner increases their bravery. Where they get good is their 4+ save, -1 rend on all of their weapons, and shield that bounce mortal wounds. They're also only 90 points per ten, or 240 points for a unit of 30. That is incredibly cheap. The champion did lose his grenade from the last scroll, but it's a minor change that cleans up the new warscroll. 

Next are Fireglaives, the ranged infantry with their Pyrelock rifles. They're identical in almost every way to Ironsworn, except that they swap the mortal wound-bouncing shields for mortal wound-inflicting guns! 6's to hit will inflict a mortal wound in addition to the actual damage caused by the attack, which has streamlined the scroll nicely from iterations in the past. 

Both of these units are Battleline for the army. 

Bull Centaurs are your heavy shock cavalry (can you call them cavalry if the rider is also the mount? Maybe, they're just big, angry, fast guys...). They carry the same shields as the Ironsworn and sport Rend -1, damage 2 weapons. With five wounds each, they're tough to shift, but they're 180 points for three models, so it's an investment to take a decent unit of them; an investment you want to build around. 

The last unit is the K'Daai Fireborn. The models for these guys are unreal, and they give you some much-needed speed! Movement 8" and run & charge allow them to be where you need them to be. Their save can't be modified, which is nice, and their attacks have a 3" reach and D3 damage, so they can actually beat down on low save units. 

WAR MACHINES:

Let's be real, you don't take Chaos Dwarfs and leave all the war machines at home. These are some of the most lethal war machines in the game, and have had the fortune of not only combining the profile of the crew and machine into one, but sitting under that 8-wound threshold that allows them to benefit from cover. 

We'll start with the Magma Cannon, because this model should be in every army. With a 2+ save in cover against shooting, and no deterioration chart, the Magma Cannon takes some effort to destroy. Its 18" range is increased to 24" if there's a Daemonsmith nearby, and it straight up murders things. It doesn't roll to hit, bypassing Look Out, Sir and any other negative modifiers. It doesn't roll to wound. You just pick a target, roll a dice, and on a 3+, it suffers that many mortal wounds. Boom. If the target has 10 or more models, you add 1 to the roll, meaning less chance of failure and the potential to do 7 mortal wounds per shot. In the current meta with -1 to hit modifiers being very much a common sight, this war machine is a must-include in my eyes. And I don't mean just one...

The Deathshrieker Rocket Launcher is similarly hard to kill, except that it has the luxury of a 36" range and ignoring line of sight. With bonuses for targeting units with 5 or more models, and an extra shot from a nearby Daemonsmith, its worth all 120 points! 

The last "Artillery" war machine is the Dreadquake Mortar, with a 40" range, ignoring LOS, and with 10 wounds (missing out on that cover bonus). This is the most expensive and least useful of all three war machines. It only hits on a 4+ (3+ with a Smith nearby), and has a single attack unless it wants to risk D3 mortal wounds for a second shot. IF you hit and wound, you do have Rend -2, which is nice, but D6 damage. If you've used a D6 damage profile before, you know full well how underwhelming that can be sometimes. For me, the Mortar just doesn't stack up to the far more reliable Magma Cannon or the far cheaper Deathshrieker.

The next two war machines are Behemoths, rather than artillery, which means they're not competing for slots with Magma Cannons. The Iron Daemon comes with a pretty nasty Rend -2 shooting attack, while the Skullcracker is built for one thing and one thing only; pulverising everything it touches! Both come with 11 wounds and a 3+ save, and start with a 10" move characteristic, giving you some valuable assault units, but they aren't just a blunt force tool. They can also tow artillery pieces behind them, giving the shorter-ranged Magma Cannon movement 10" rather that its pretty pathetic movement 3". There is no negative repercussions for moving with war machines, so it means you can quickly redeploy your Cannons and threatun heroes and monsters that your opponent perhaps thought were safe!

BATTALIONS:

In this most recent publication, there are three Warscroll Battalions available to the Legions of Azgorh, and depending on what you prefer, one of them will fit your list. There's one for Bull Centaurs, one for War Machines, and one for massed infantry.

The Blackshard Warhost is built on the back of Ironsworn and Fireglaives, and gives them a boost to their bravery. They also re-roll hit rolls of 1 if they haven't moved that turn. This formation is good, because it covers your Battleline requirements, cuts down your deployment drops, and gives you a Command Point and an Artefact. The actual bonuses from the battalion are fairly so-so. With such low movement to begin with, you don't really want to be standing still, particularly with Ironsworn. They need to be pushing up the board, and ensuring they have an impact on the flow of the game. The bravery bonus is also made significantly less important if you're including Drazhoath in the list, as he allows them to ignore Battleshock anyway. Worth taking for more of a practical list building perspective, but the battalion itself doesn't offer much in the way of rules.

Hashut's Wrath Artillery Train has me torn. It allows you to treat all units from the Battalion to act as if there is a Daemonsmith within 3" allowing them to act at full capacity without having to be babysat by the Daemonsmith. But you MUST take at least one Iron Daemon, and there's no option to take Skullcrackers. This, to me, is still a fantastic Battalion, as it allows you some flexibility with your Smith, and encompasses all the artillery pieces you were already going to include in the army (because let's be real, if you're not taking two Magma Cannons, what are you even doing...). This formation allows your Iron Daemons to tow Magma Cannons 10" and still shoot 24", as they no longer care about outrunning the Smith. It's also the cheapest of the three Battalions, weighing in at only 120 points. Great Value.

While the first two have had previous iterations, this last Battalion is brand new. The Execution Herd is all about Bull Centaurs. To run it, you need Shar'Tor, a Taur'Ruk and three units of Bull Centaur Renders. This covers all three of your Battleline if you make Shar'Tor your general (which is a no-brainer in this battalion). If you're going in on Centaurs, I'm of the mind that you might as well go all in. All the bonuses to them from heroes are Auras, so you might as well get the most out of it and jam as many centaurs into those auras as humanly possible. The battalion rules are also pretty great. You mark an enemy unit for death at the start of the game, and all units from the battalion re-roll hits against it. Once that unit's dead, you can pick a new unit and keep rampaging. Super solid!

THE DOWNSIDES:

There are three significant downsides to this army.

Firstly, and most glaringly obvious, is the model range. The army is purely Forge World, and its not what you'd call a budget army. The models are actually pretty cool, and if you're not opposed to working with resin, then you'll have no problems, but if it's out of the question, your only real choices are third party miniatures (of which I'm yet to see a suitable range), or convert, convert, convert! With more Duardin models available than we've ever had before, and with a kit for almost every possible bit, converting an army isn't a terrible idea, but can often end up costing you as much as the Forge World models anyway.

Secondly, Chaos Dwarfs have all the same drawbacks in gameplay that all the other dwarfs have. They're slow. And unlike Kharadron Overlords, Fyreslayers and Dispossessed, they have zero movement tricks up their sleeve. There are no avenues for unconventional deployment or reserves. If you want something on the other side of the table, you're going to have to march over there and get it. Or ride a steam engine of death... But there's no flying in the army, which means punching through every unit that is thrown in front of you. Artillery can compensate for that a little, taking out key elements from a distance, but bodies will need to hit the ground to win games.

And thirdly, emblazoned on the first page of the PDF is that big, dirty word... COMPENDIUM.

This is a brand new document, and it's important to keep in mind that these models are still 100% available. It should also be noted that Forge World seems to march to the beat of their own drum, so I'm honestly not expecting them to "Bretonniate" the Legion of Azgorh anytime soon. But, it's something to keep in mind.

SUMMARY:

This was a big boost for the Legion of Azgorh. Great allegiance abilities, artefacts and command traits, coupled with the new rules and endless spells, have made the army far more viable, despite a few adjustments to scrolls that could be seen as toning back. All in all, the document and the army are very streamlined with plenty of cool options and units. I don't think they're in that upper bracket of armies, but they're viable. They lack any kind of summoning or healing mechanic, but I think in the hands of a good player, they could be incredibly effective. And with the meta in the place that it's in, and knowing that obscure armies have been very successful in the past, they're so crazy that they might just work...

I, for one, would love to see the army on the table.

What do you think of the new rules? Are they good enough to entice people into the army that's been lurking in the shadows for years? Or do you think they're irrelevant and and should be going the way of Tomb Kings? Let me know your thoughts.

Thanks for reading,
Gabe


Sunday, 21 January 2018

#117: Tinyhammer Event Overview Pt 2

The day was upon me, and usually on the day of a tournament, I like to arrive a little bit early, enjoy a coffee and settle into the gaming mindset. Today would not be quite so peaceful.After spending the previous evening madly putting final touches on the basing of the army, I raced to the venue and arrived with literally a minute to spare. Great start!

My first game was against (ironically enough) against Clan Pestilens, although it was fairly different to what I had in mind.

Plague Priest
Plague Priest
40 Plague Monks
40 Plague Monks
Plagueclaw Catapult
Plagueclaw Catapult

The scenario was Battle for the Pass, which I knew was gonna be an uphill battle, as my opponent had two huge units that would prove to be hard to whittle down. My opponent snagged first turn and his two catapults went to work, killing four skinks out of one unit, and obliterating the other off the board. Not the start I had planned.

I then teleported up with Kroak, got ready to get on a Balewind, then managed a total of two mortal wounds on a Priest with three spells... Not exactly the start I had planned. I did manage to back it up with a double turn, which proved far more successful, slaughtering both Priests, and belting around the catapults to imminent destruction.

I'll be honest, I was pretty scattered in this game, as I got the objective scoring conditions mixed up with the Knife to the Heart conditions, and so I was playing to a completely different set of rules than I needed to, none of which favoured me! I am glad that it was to my disadvantage, because if I got it wrong and just ran away with a tainted victory, I probably would have conceded.

As it was, I managed to survive the initial onslaught, then kill of key pieces and spend the rest of the of the game managing the hordes and capping objectives. The superior movement and teleport capabilities of Seraphon allowed me to be in the right place at the right time, denying my opponent the opportunity to score, and claiming objectives that were left open to capture. In the end, the scoreline displayed a convincing win to Seraphon, despite taking horrific losses. This landed me a hard-fought Major Win, and a great result leading forward, pushing me into the top bracket going into round two.

Round two was where things began to go down hill on the ol' game department. My round two match up was against a bit of an uncommon faction that turned out to be the worst possible match up leading forward. A Phoenix Court!

Annointed on Frostheart Phoenix
10 Phoenix Guard (battleline)
20 Phoenix Guard (battleline)
Loremaster (Allies)
3 Longstrike Raptors (Allies)

The scenario was Duality of Death; it was just the perfect storm. He won priority, moved the Phoenix onto one objective, and just flooded the other with Phoenix Guard. This first turn pretty much zoned me out of both objectives, and Kroak's formidable arcane arsenal was stifled by the mortal wound save on the Phoenix units. I did manage to put a few points on the board late game with my Priest, but it didn't take long for the Longstrikes to punch enough holes in him and put an end to that.

This ended up being a sound defeat, and a very deflating game. I just didn't have an answer for a lot of the elements in his list, and every one of my Insights yielded better results for my opponent. Luck, the scenario, and the opposing list took its toll, and I just couldn't claw it back.

With a win and a loss under my belt, I knew that I'd be sitting in the middle of the pack, so my next opponent could literally be anything. The names and tables were called, and I ended up getting matched up against Tzeentch. Here we go. Even within the Disciples of Tzeentch book, there are several different builds commonly seen, but what was deployed against me was entirely different.

Tzaangor Shaman
3 Enlightened
20 Acolytes
20 Acolytes
Witchfyre Coven

I looked at the list, and at first glance, it didn't appear to really do anything. Three Enlightened was manageable, I was only facing a single spell from the Shaman that should be easy enough to shut down, and Acolytes were great for holding objectives, but would likely suffer heavy losses to Kroak and the Salamanders. As it turns out, however, this army had a surprising amount of shooting. The battalion allows the acolytes to shoot in both the hero and the shooting phase with an 18' range, thanks to the unit champ. That's a lot of shooting coming my way! The scenario was Starstrike, so I had a turn or two to blitz units off the table before the rubber hit the road. My opponent, having a two-drop army, gave me first turn, as there was nothing in range and no objectives to cap.

I wasted no time in rolling no Insights, and failed Summon Starlight with the Priest on Kroak to make him -1 To Hit with combat and shooting. At that point in the game, I should have stepped back and said to myself 'there's no pressure, your opponent can't touch you this turn. Play it cool'. That's what I should have said. Instead, I launched up the table, cast Mystic Shield upon myself, then failed Summon Balewind, Comet's Call and Celestial Deliverance. Zero damage was caused, and I was sitting on the ground a mere 9.5" away from a shooting list with only Mystic Shield to protect me. Oh dear...

My opponent's first turn consisted of firing eighty shots into Kroak, before charging the Enlightened in to make sure there was no possible way that he could survive his Battleshock mechanic. Just like that, before any objectives had even landed, half my army was gone! OUCH! It was a pretty unfortunate hero phase on my part, getting a single spell off, and not reaping any Insights. But them's the breaks!

It was at this point of the day that I received a pretty distressing phone call and had to leave the event to attend to an urgent matter. It wasn't how I wanted to finish the day, but it was necessary. I felt pretty bad for my round three opponent, as I didn't really give him much of a game, but he was very understanding and accepted my surrender to give him a major victory.

For that reason, I didn't play the fourth game, which counted as a forfeit.

With the huge focus on painting in final scores, I finished 18th out of 38 players, which I was over the moon about! I managed to get an 18/20 for painting, which catapulted me out of the bottom bracket, and was also a pretty satisfying milestone for an army that I'd managed to punch out in a week. Painting was based off a checklist, which helped me work out what was needed for a decent score.

All in all, and having to leave early aside, I think what really cost me a decent showing at the tournament was my selection of list. I'd only played two practice games, and I think I took it with the focus of "doing well" rather than "doing well with my army". I think if I'd taken my Pestilens, which I think I would have enjoyed more, then sure, I might lose a game or four but I'd be using my army. My goal is to do well with Pestilens this year at tournaments, and that's tricky to do if I don't take them.

The tournament as a whole was well run; there were no incorrect match-ups that I was made aware of, and it stuck to schedule, which are both easier said than done. If I were to raise one piece of constructive criticism, it would be that I think the event would have benefited from submitting lists, and those lists being checked before the event itself. It's a quick and easy process these days with tools like Warscroll Builder, but as it happened, there were two illegal lists there that could have been handled before the event. Did they have an impact on the overall standings? It's hard to tell, but it's also an issue that you hope, as a player at an event, is not going to be a question in the first place.

It was a great turnout! Thirty-eight players to a 1000pt Tournament is nothing to sneeze at. There were even a couple of players who made the drive down from Toowoomba (around two hours, depending on how slow or fast you drive), and it was a pleasure to meet them! There were probably only about fifteen armies that were fully painted, but of those fifteen, there were some exceptionally painted miniatures on display.

It was somewhat of a bittersweet event, all things considered, and not the way I wanted to kick my tournament season off, but it's one under the belt, and I learnt from my mistakes and incorrect decisions.

Now, to focus back on the Chaos Grand Alliance... Oh, look! Maggotkin!

Thanks for reading,
Gabe   

Sunday, 7 January 2018

#115: New Year, New Me! Well, not really...

There's something about New Year's Resolutions. They aren't restrained by reality or doubt. No painting project, no gaming achievement, no hobby goal is beyond reach. New Year's Resolutions are fuelled by good intentions and pure, unfiltered optimism.

So, here goes.

January is a good time to recalibrate and reassess, especially after such a busy year last year, so I wanted to lay out to you my goals for 2017.

Let's tackle painting first. Last year I painted over two hundred models, which was my target. It didn't matter if it was a dishevelled Plague Monk or a towering Dreadknight, each model is one. Many times, I considered "cheating" counting larger models as 3 or even 5 for the tally, but that wasn't the challenge I set myself, and it won't be this year either. Numbers-wise, I'd love to match last year, and tick over that 200 model mark. I'd also love to finish two armies in their entirety as part of that 200 model lot. Last year, I practically finished Clan Pestilens, but the rest of my painting was largely unfocused, leaping from one project to the other in a sporadic and aimless pattern. Don't get me wrong, sometimes whimsical painting is the perfect method to break through Painters Block, which afflicts us all in some degree or another throughout our hobby lives. But I'd love to just smash out and "complete" projects.

But you and I both know, dear reader, that in the world of miniature wargaming, a project is very rarely completed.

Gaming wise, the evolution of the Australian Age of Sigmar scene has gone through an incredible level of growth in 2017. With the Heralds of War (an Australian Podcast) facilitating and maintaining the national tournament rankings, it has given the community a fire in their bellies and a goal to fight toward. Each event and tournament is now bigger than just a day-long or two day event. It's building your campaign toward Masters; the tournament to rule them all. In Australia, the top 16 ranked players in the nation get an invite to Masters. While I would love to get to Masters on my own merit, I think it needs to be said that there are dozens and dozens of great players standing between myself and that elusive upper echelon of gaming. So here's my realistic goal in a competitive sense. I want to finish the tournament season in the top 32 players in the country. I'd also love to finish the year with an Icon next to my name, which represents "Best Ranked Player in Faction". The Icon I have my eyes on is, of course, Clan Pestilens. If I can finish the year as the highest ranked Pestilens Player, I'll be a very happy man!

Lastly, of course, as many of you will know from the last couple of months, probably my biggest goal for the year is to move into video content, and to produce it at a high quality level. The studio is set up, the terrain is being painted and the table is almost ready to throw dice on! I went shopping for recording and sound equipment over the christmas break, and I have to say that I'm really excited for this next step. The way I see it, if I'm going to do video content, I want to create it to the highest level of quality that I can. There's no point making a half-hearted effort. I'm all in.

So there you go, there's my three New Years Resolutions.

Paint 200 Models including two complete armies.
Finish 2018 in the top 32 Players in the Australian AOS Rankings with an icon next to my name.
Move into video content on a larger scale.

I hope that you choose to follow along on this journey with me! I have an inkling that it's going to be a great year for the game! If you haven't already, 'like' the Facebook page to keep up to date, and of course, I want to hear from you! What are your New Years Hobby Resolutions?

Sunday, 19 November 2017

#109: In the shadows of the Temple… My 2018 army plans.

As I work my way through the Masters player pre-event interviews, one question that I've been asking each person (although in some cases, it just naturally came up in conversation) is whether or not they'll be taking on a new army heading into the new calendar year, and in most cases, it's a resounding yes. For the most part, each player is taking on an army that is quite different to the army they played for the 2017 tournament circuit. In my mind, this is fantastic. It shows that the scene is constantly evolving and diversifying.

Having asked the question to some of the best players in the country, however, had gotten me thinking about what my 2018 main project would be. This year has been pretty much split down the middle. The start of the year saw me wrapping up my Khorne Bloodbound army, while the second half of the year was dedicated to crushing out my Pestilens army, a project I originally started because it was a fairly low-cost army, and I already had two boxes of Plague Monks from my existing Skaven army. A huge incentive was that the whole range (excluding Plague Censor Bearers) were plastic kits, and all were pretty affordable. I didn't really take into account the time investment required to paint the army to a standard that I was happy with, but I took it on, and am predicting completion of the project to happen over the Christmas break. Only forty five infantry to go…

But with the end in sight, and my weak-willed resistance to impulse purchases, I began to plan my next army. Clan Pestilens will be my tournament army for the first half of the year while I begin work on the next army, but I needed something to redirect my energy after the rats were complete.

With an open mind, and GHB17 as my canvas, I began to ponder and plan what army I could sink my teeth into. For once, I was completely open to any Allegiance, any Grand Alliance, anything. My goal with the army was to plan and build a force that would not only be competitive and threatening (for some) on the table, but also have a strong theme, and enable me to paint an army that would perhaps be a contender for Best Painted at any event that I happened to go along to. Not saying that I would necessarily win any, because I'm the first to admit that my painting is not Golden-Daemon-worthy by any stretch, but I wanted an army that would catch the eye and stand out from the crowd.

I also wanted an army that didn't require me to paint 100+ models *shudders*…

So, with the mindset of artistic potential, competitive ability and low model count, I began scribbling down a shortlist. Soulblight and Ironjawz were both realistic options, as were Stormcast, but all were currently in-progress armies of good mates of mine. So, I continued searching until I read through a certain set of war scrolls that I'd previously written off.

Beastclaw Raiders.

They weren't uncommon on the table by any stretch, but typically they would be an element within a Grand Alliance Destruction army; it was extremely rare to see a Beastclaw Allegiance army. Simply put, Grand Alliance was just straight up stronger. It compensated for the low model count by giving players access to Grots and Bonesplitters, and gave them a considerable buff in the form of things such as Battle Brew. There was little-to-no motivation to restrict yourself to just Beastclaw.

But that's all changed. While Grand Alliance Destruction has been made slightly less attractive, the inclusion of the Allies system has neatly offset the model count problem that Beastclaw seemed to have. All of a sudden, they had a new lease on life!

My mind was made up.

So, how did I go about planning my list? From a competitive standpoint, one of the scariest things that BCR has access to is Thundertusks. Being able to hand out massive chunks of mortal damage from a safe distance was very, very scary. They're capable of just deleting characters, or crippling larger units, with only luck to stop them in most cases. Ok, so there was my focus. Ice Lasers!

Thundertusks do diminish in strength as they take damage, and for them to remain a viable threat, I needed them feeling tip-top. This naturally led toward including some healing mechanics in the army to keep damage output at its possible highest. A Frostlord on Thundertusk with the Pelt of Charngar (each friendly hero phase, roll a D6; 1-3 heals a wound, 4-6 heals D3), and two Huskards of Thundertusks (each triggering their healing abilities on a 2+ while all three characters are alive) meant that I had three solid, regenerating fire-bases to build my army around. Not that there was too much left to play with after purchasing these three juggernauts.

Next up was Battleline slots. Taking a Frostlord on Thundertusk conveniently unlocks Yhetees as Battleline, and they have some pretty cheeky Pile In shenanigans in their box of tricks, as well as being a little bit scary for smaller units. So I picked up two units of three to cause mayhem. All three characters and the Yhetees have negatives to hit them in close combat, so I'm hoping that keeps them all alive just that bit longer. My last Battleline choice was a unit of four Mournfang. While I don't think they are quite the wrecking ball they were in 8th Edition, there's no debating that twenty-four wounds over four models is nothing to cry about, and they aren't too shabby in combat either. I wouldn't put money on them to drop Archaon, but they can punch on with most equivalent units pretty reliably.

So, I'd completed my character plan and ticked all my Battleline requirements… And was left standing with 220 points. With only thirteen models in the list, I desperately needed some bodies. And I found them in Gutbuster allies, bringing in two units of twenty Gnoblars. Fantastic! I mean, sure, Gnoblars aren't going to kill anything, and they tend to die if they fart too hard, but they filled several valuable roles that perfectly plug (PLUG!) the weaknesses of BCR. I had two large units that I could leave in my backfield to deny deployment tricks and control the board, or plonk them on an objective and not stress about leaving martial strength away from the main brawl, or (probably most commonly) use them as screening units to absorb charges and prevent scary combat beasts from charging unimpeded into my crucial characters, hopefully giving me time to either counter charge them or blast their faces off with beams of ice magic.

One other thing of note about the list is that I took Blood Vultures on both of my Huskards. The reason for this is, where the Chaintrap and Harpoon Launcher roll dice to hit and wound, offer a save and inflict different degrees of damage, the Vulture is guaranteed to do a mortal wound every turn, with a massive 30" range. It might not always hit where I want it to, but that angry bin-chicken is going to gouge out the eyes of some poor fool no matter what. I think Vultures are by far the best ranged option for any of the riders that have a shooting option.

Now, I am very aware that this army still has glaring weaknesses, and I'm not expecting to be winning GT's left right and centre with it, but I think it has real potential to cause some headaches. I think if I invest time and practice in, I can become quite adept with the army.

So that's model count and the competitive side of things sorted. That leaves only one aspect; creative potential.

It goes without saying that Beastclaw Raiders in winter themes on snow bases has been done. That is their lore after all. It makes sense. But it's been done to death. Snow-themed BCR armies look good, but I needed something that would leap out and catch the eye; something different and unique. The decision to go in the complete opposite direction was an easy one. My "alternative colour scheme" armies have been a bit hit and miss over the years (my blue Grey Knights being an obvious and self-explanatory example), but I'm really satisfied with the pallet that I've settled on.

My ogres will wear deep red robes broken up by leopard skin pelts. They would ride natural-toned monsters based off real-life animals from our own world (you may have already seen my Jackal-inspired dogs that I'm using as Frost Sabres in a different list to this), and the basing would be crumbling ruins in the desert, using the fantastic Shattered Dominion large basing kit. As easy as that was to sum up, it's actually quite a challenge for me, as my style of painting naturally lends itself toward cartoony details and bright pops of colour. But I think it will be a good learning experience, and you don't learn if you don't push yourself. So, there it is. I'll post the list below, and hopefully you enjoyed the breakdown. Do you like it? Do you think it's trash? And are you starting a new army for the new year? Hit the comments and we'll have a chat!

Thanks for reading,
Gabe

Frostlord on Thundertusk (General, Everwinter's Master, The Pelt of Charngar)
Huskard on Thundertusk (Blood Vulture)
3 Icefall Yhetees
3 Icefall Yhetees
4 Mournfang (Gargant Hackers)
20 Grots (Gutbuster Allies)

1980 points