So, why Chaos Dwarfs, firstly.
There's no question that Chaos Dwarfs are among the rarest armies around (mostly due to price and ease of access), and usually if you don't see an army lots, it's a pretty good indicator that it's not great; not always, but generally. But after reading over the... *sigh*... PDF (my gaming group will remind me every fifteen minutes or so that it's not actually a Battletome), I started seeing a lot of units that I liked the look of, and a playstyle that sounded like a hell of a lot of fun! The more I looked into the army, the more interested I became, and after picking up a whole shoebox of Forgeworld goodness, I was committed. I began ordering, building and painting, spending hours and hours painstakingly putting all of those resin models together to try and form a cohesive army.
And here's what I came up with.
Allegiance: Legion of Azgorh
Leaders:
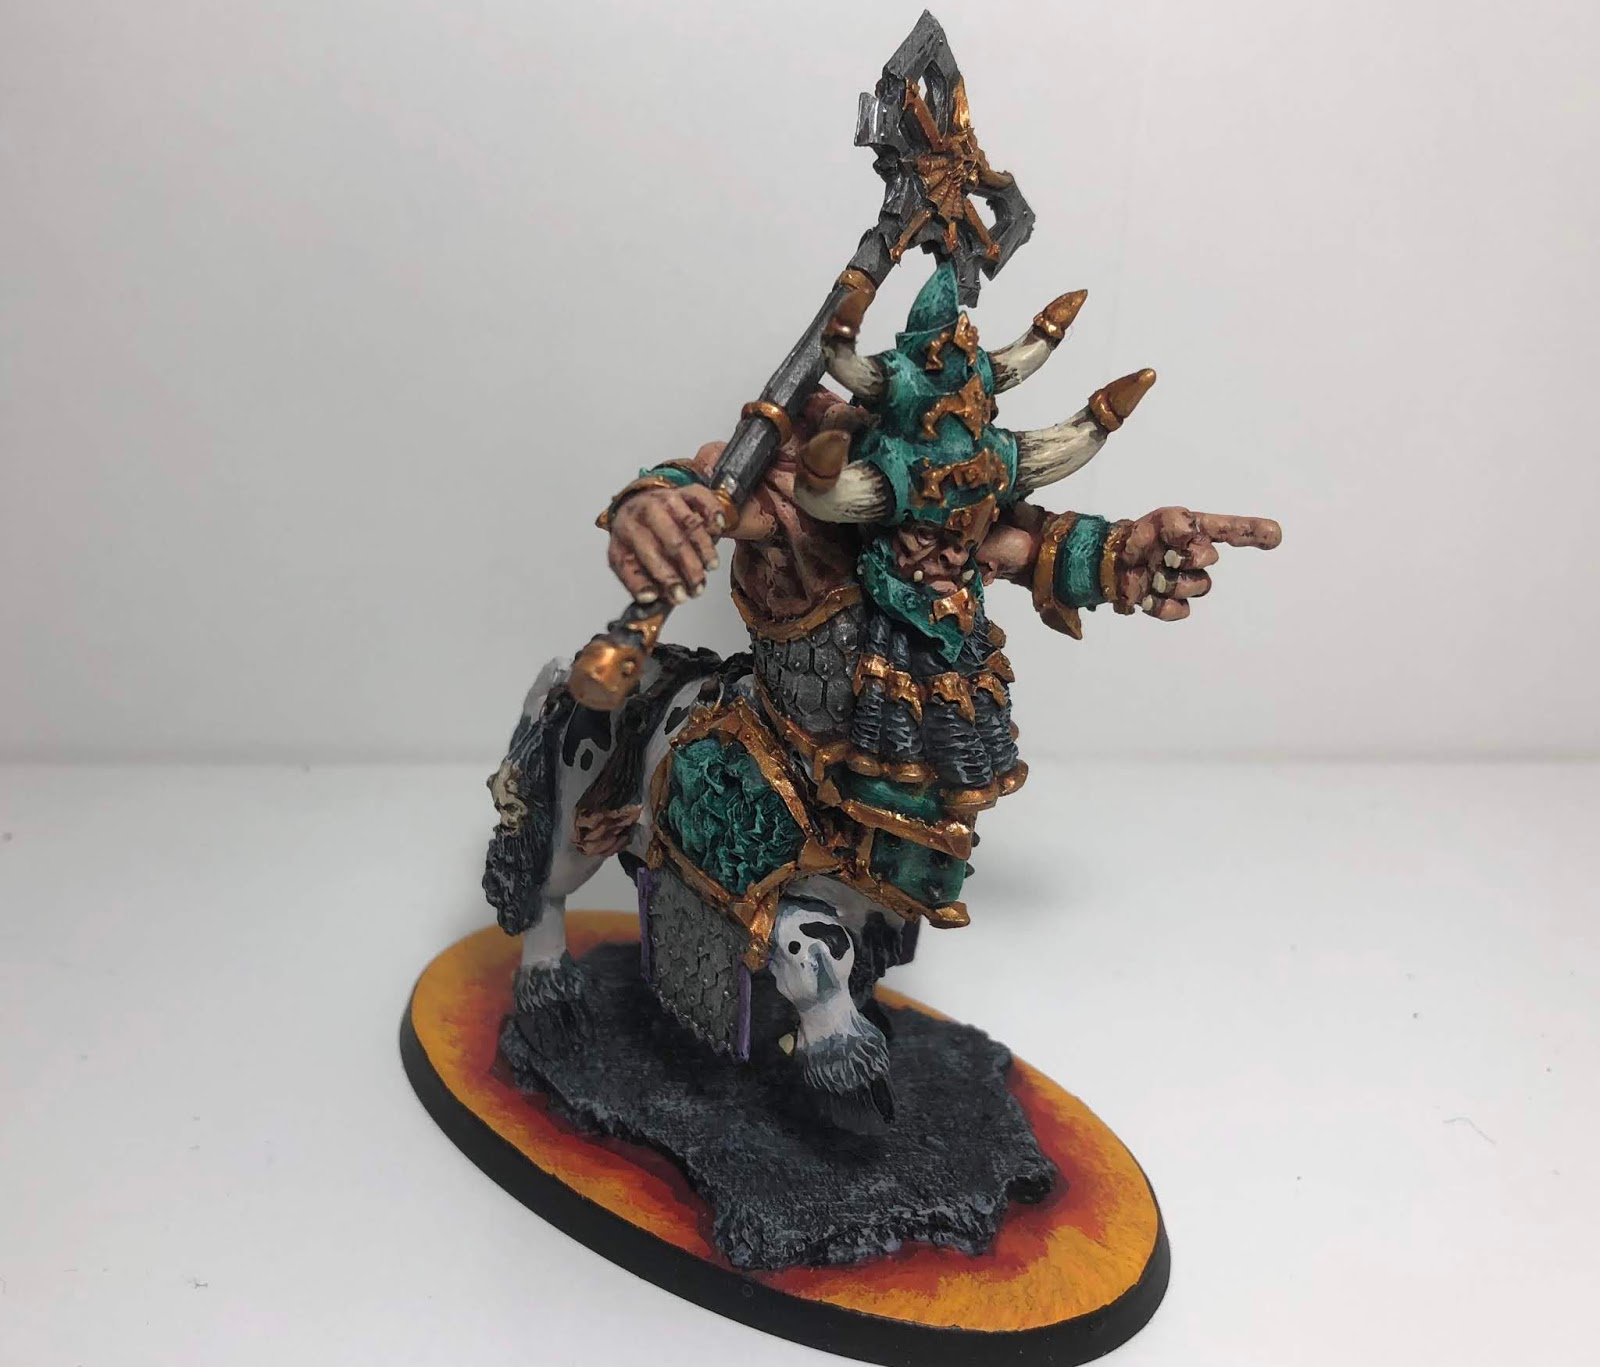
Bull Centaur Taur'ruk
- General
- Trait: Grotesque
- Artefact: Armour of Bazherak the Cruel
Daemonsmith
- Darkforged Weapon
Chaos Sorcerer Lord
- Mount: Steed
- Runestaff
- Allies
Battleline:
10 Infernal Guard Fireglaives
10 Infernal Guard Fireglaives
20 Infernal Guard Fireglaives
Units:
12 K'Daai Fireborn
10 Chaos Warhounds
- Allies
10 Chaos Warhounds
- Allies
War Machines:
Magma Cannon
Magma Cannon
Skullcracker War Engine
Total: 1940
Extra Command Points: 1
Allies: 320/400
Wounds: 136
So, let's break this all down. We'll start with Battleline. For me, the Fireglaives are by far the best Battleline in the army, because while they're as slow as Ironsworn, they can interact with models up to 20" away, and can kick out an alarming amount of ranged damage. Even doing mortal wounds on unmodified 6's is a huge deal, as it bypasses any number of the negative To Hit modifiers out there. This allows you to put some hurt on a pesky hero that thinks they're safe. In a game where bodies hold objectives, I knew that I needed plenty of boots on the ground. I didn't want to go "horde", so a 20-man unit and two 10-man units gave me three units to use as utility models depending on the scenario. If I needed screens or objective campers, they could do that while still dishing out the damage.

With Battleline sorted, I moved on to Heroes. The Taur'ruk is an easy choice as he's currently very cheap for what he can do. Five Rend -2 Damage 3 attacks will put the hurt on most things, and between Grotesque (-1 to hit in combat), the artefact that gives him a 5++ and Blackshard armour (ignore the first would of each shooting and combat phase), he can prove infuriatingly tough to bring down. All hail the Dairy Queen!
With only one artefact, my other two Heroes were both very deliberately chosen because they're wizards. With missions being what they are, I wanted to be able to compete in all of them, and so a Daemonsmith and an allies Chaos Sorcerer Lord on Steed made it in. The Daemonsmith is great for 100 points, buffing war machines, lobbing grenades and having one of the best warscroll spells in the game.

The Chaos Sorcerer Lord was chosen because he's fast on a Steed, and because his spell is a great force multiplier. Both of these factors came into consideration because of my next unit.
12 K'Daai Fireborn

At 480 points for 12, these have fast become a staple in literally every list I write. They off a relatively slow army a fast, running and charging sledgehammer unit with enough bodies, wounds and damage output to clear an objective and score it for themselves. 3" reach on their 60 attacks (each doing D3 damage) means that, in most cases, the whole unit is attacking, and whatever they hit is gonna feel it. The Sorcerer Lord's Daemonic Power spell just makes them better again, giving them precious re-rolls. If the spell doesn't go off, I've always got Oracular Visions in the pocket. Otherwise, it typically gets put on another unit that I need to keep alive. The Sorc Lord also plays the vital role of fast-moving babysitter, able to keep up with the K'Daai and use CP to either get them moving faster with runs, re-roll botched charges or mitigate their mediocre Bravery 6 when things go south. It's like the two were made for each other.
The one thing that the K'Daai lack is any kind of Rend. And while the Taur'ruk offers me some high-quality attacks, I really wanted a hammer piece that I could launch into people and reliably dish out carnage. The Skullcracker War Engine was too good to pass up for 200 points, churning out 4D6 attacks on it's main profile (because, let's be honest here... we're overcharging that engine each and every turn), as well as having decent move and a great save! The challenge I faced was that the model is no longer in production, so I decided the employ the skills of one very talented Blake Kerwick to create me an infernal machine worthy of the legion.

While it's not really a train as such, it's definitely a War Engine, it's definitely imposing, and it doesn't offer me any advantages through modelling. In fact, he's 100% impossible to hide, so he's getting shot up and blasted with magic no matter where he stands (which is ideally deep in enemy lines) He also gives me a nice centrepiece for the army!
With points starting to run out, I simply couldn't resist the idea of my Daemonsmith babysitting two Magma Cannons. They are hands down one of the scariest artillery pieces in the game. People can handle being shot at with Ballistas. People reeeaaally don't like their -2 to shoot heroes catching a jet of lava from 24" away that ends up doing six flat mortal wounds! I like the magma cannons because there's only one chance of failure. There's no hit or wound roll, and most of the time, your opponent doesn't have an opportunity to stop it either. It doesn't care about modifiers and it doesn't care about shiny armour. All it cares about is turning that Lord- Castellant into a flame-grilled steak from across the board.

One of my last purchases that I personally believe is essential, either by way of a Battalion or by paying points for it, is a spare command point. This is especially true when it comes to this army, specifically with K'Daai. They have average bravery, but a hefty price tag, and the last thing I want is to take a heap of damage from an alpha strike, and watch the unit melt. Some armies can get away without CP in the first turn, but I don't like to risk it.
With only 170 points left, I turned once again to the Allies pool, and started flicking through warscrolls available to me, looking for a unit that did something that my army didn't already.
Speed and cheap bodies.
And that's when I settled on the humble Chaos Warhound. With a 6+ save and Bravery 4, they are the definition of sub-par, but they're cheap, expendable, insanely fast (at least by Dwarf standards) and give me 20 bodies that I can willingly put in harm's way in order to protect my far more valuable elements. Having 20 bodies with a decent footprint and a 16" run move plays a huge part in objective play, and also gets in the way of your opponent's perfectly planned offensive push that would otherwise be slamming into your Fireglaives. They were a bit of a left field choice, but turned out to play a huge part in board control and objective play.
So, now that I've gone over the units, lets talk about the elephant in the room. This is a 12-drop army. The decision on who goes first is never going to be in my hands, realistically. And I'm OK with that. I think that unless you can get under 4-5 drops, it's not worth worrying about, and you should instead have contingencies in your army that have an effective turn one, regardless of who goes first. I got to the point where I had about 9-10 drops, and I just stopped caring, instead choosing to just take the units that I really wanted in the army. It ended up not even being an issue at the Heat 1 anyway, as the highest drop army I faced was 6. I just chose not to stress about that. I see that decision of who takes first turn as another opportunity for my opponent to make a mistake. Because my army has such a blend of bodies, speed, shooting and combat, it allows me to at least try and salvage a bad situation, and capitalise on a good one early in the game.
The army as a whole is quite resilient, thanks to decent saves on even my foot soldiers, and Blackshard Armour, which doesn't sound that impactful on paper, but has huge ramifications. I have enough units that I felt like I could react in both deployment (as I would be able to see where my hammers, heroes or artillery were going to be most impactful) and in the movement phase itself. The Taur'ruk often played the role of either tanking a unit that I didn't want hitting my riflemen, or assassinating an important target. The Skullcracker on a 3+ save, often with Visions on him from the Sorc Lord, was tough as nails, and racked up quite the kill count over the weekend.
And I cannot speak highly enough of the big unit of K'Daai. When you move the unit with purpose and support, using charges and pile-ins to traverse the board, planning turns ahead about where you want them to be, it has such a catastrophic impact on your opponent's army that it can swing the flow of an entire battle. Their 3" reach also means that the unit can string out and hit 3-4 enemy units without sacrificing any attacks. Even units behind screens aren't safe, unless the opposing general is particularly savvy with his model placement. They are the heart and soul of the army, and have rightfully earned their place in my list with blood.
Lots and lots of blood.
So, there you have it. That's the army that I took to Heat 1, and managed to land 2nd place! I'll be posting up all five battle reports from the event over the next little while, so keep an eye out for that!
Until next time, thanks for reading.
Gabe
Always a pleasure to the really rare armies painted to a great standard! Sounds like they weren't too shabby on the tabletop either if you finished second.
ReplyDeleteLove this line-up. As a fellow LoA player, wishing you the best of luck with it.
ReplyDeleteAwesome to read. Im just about to get into the Legion, so this is great info. Hadnt really considered the K'Daai, thats a really nice combo with the Sorc Lord!
ReplyDeleteHi!
ReplyDeleteWhere were the battle reports posted?
It interests me :)