Showing posts with label Competitive. Show all posts

Sunday, 14 April 2019

#170: Championship Heat 1 Battle Report - Game 1: Legion of Azgorh Vs. Ironjawz

The first Championship Heat was finally here, and I was debuting my Legion of Azgorh at 2000 points! I'd finished painting it the night before, and went into the day on a good night's sleep and a true tournament breakfast of iced coffee.

Once the general introduction to the tournament was done and dusted, I launched into my first game against none other than local player Connor and his gold-armoured Ironjaws.

Allegiance: Ironjawz
Mortal Realm: Chamon

Leaders:

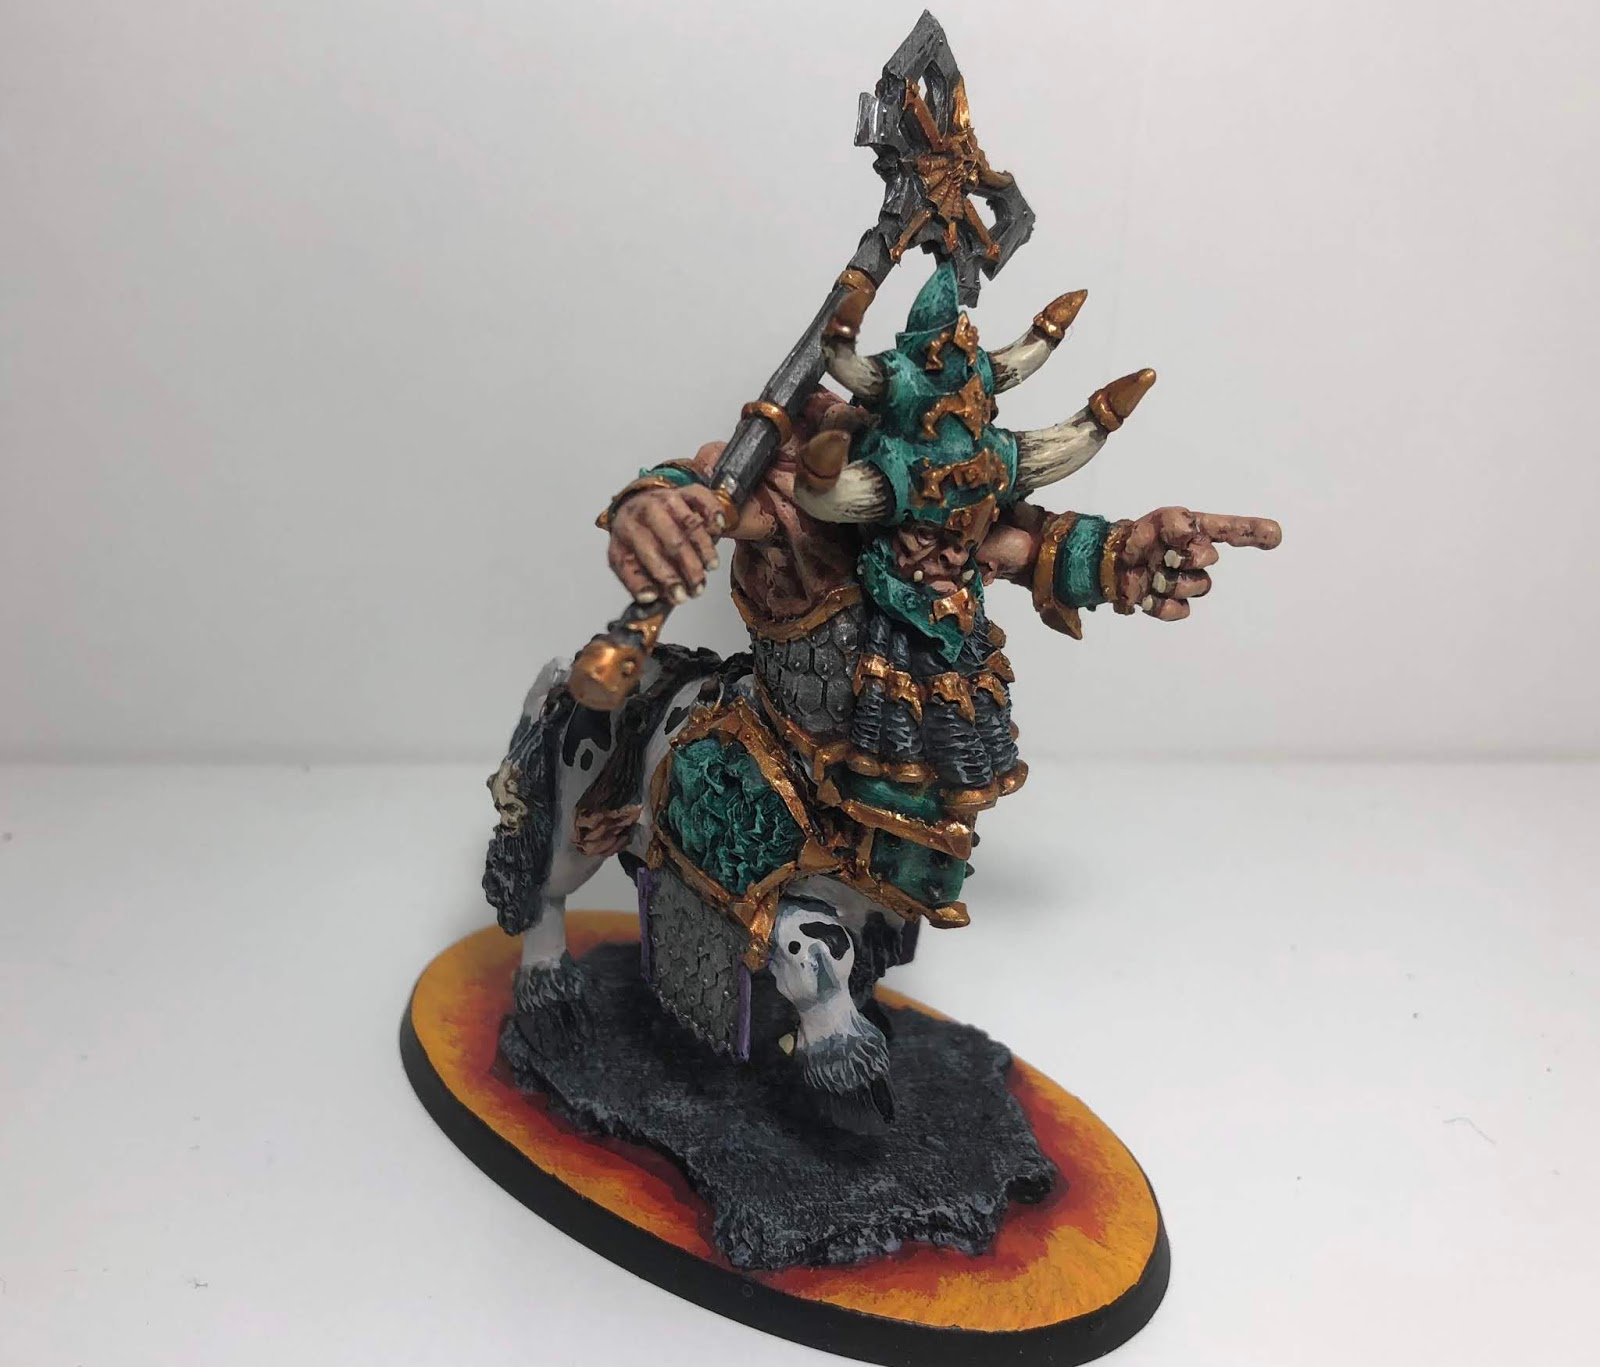
Megaboss on Maw-Krusha (General, Ironclad, Gildenbane)
Gordrakk, The Fist of Gork
Orruk Weirdnob Shaman
Orruk Warchanter (The Golden Toof)

Battleline:

10 Orruk Ardboys
5 Orruk Brutes
3 Gore-Gruntas

Battalion:

Ironfist

Endless Spells:

Chronomantic Cogs

Total: 1940

The scenarios were all randomly generated, and the first one off the rank was Border War. This was alright by me, as I had a significant numbers advantage. I was pretty confident that I could push onto the middle objectives and hold them if I could drop the two cabbages early on. I was also pretty confident in the K'Daai putting work in, thanks to their ethereal 5+ save, that would allow me to shrug a lot of the Rend-focussed attacks of the Brutes and Krushas.
My deployment was nothing too special. Connor only had five drops, so I had the luxury of being able to line up favourable units with their targets. I screened most of my army with Warhounds, knowing that the two cabbages would be charging in hot, trying to smash off everything they could. The Cannons and Daemonsmith were pretty central on my back objective, in such a way that (with a bit of shuffling) they could shoot at anything that contested the two middle objectives. From there, the K'Daai took the left flank, while the Skullcracker and Taur'ruk teamed up to cover the right flank, having only 10 Ard Boys and a Shaman to challenge them. If I could chew through their wounds quickly, I could comfortably hold that objective with two pretty durable models. 
Connor took first turn, and launched across the board with everything, capping both middle objectives, and lining up both cabbages for big charges! Unfortunely, only Gordrakk made it in, and while he comfortably smashed up the warhounds, the Dairy Queen and Skullcracker gave him a proper beat-down, bringing him to within a couple of wounds of death. 

In my turn one, the Dawi Zharr unleashed hell! 
Both Magma Cannons unloaded into the Ard Boys across the battlefield, enjoying the extended range from the nearby Daemonsmith. The screen of Fireglaives shot their rifles into Gordrakk and slayed the mighty hero, while...
...the K'Daai combo-charged the Gore-Gruntas on the objective and the Maw-Krusha who failed his charge and found himself stranded in no-mans-land. I was sure to keep the Sorcerer Lord on Steed within 6" for those handy little command abilities, but managed to charge the unit in such a way that all 12 models could put their attacks into something. 3" reach allowed me to put four into the Gruntas and drag down a pig, while the eight Fireborn that targeted the Maw-Crusha roasted him to a crisp in a single combat phase. Two cabbages dead in the first turn had swung the flow of battle heavily in my favour! I was only able to cap the left objective in the middle of the board, but I was in a commanding position. 
In Connor's turn two, the Shaman turned the Cogs to give himself a re-rollable save, while the Ard Boys charged headlong into the riflemen, slaying three. The Brutes on the other side of the board charged in to Duff Up the Big Things with their Grunta buddies and killed three through sheer weight of attacks! 
At the end of turn two, the K'Daai managed to kill off the last two Grunta's and all of the Brutes with minimal casualties in return, while the Warhounds on my flank decided to charge on in and surround the Warchanter! They managed to chip off three wounds, but lost a dog in return. 

On my right flank, the Cannons shot the remaining Ard Boys off the table, freeing up the remaining Fireglaives to shoot the nearby Shaman to death. 

In turn three, the Warhounds lost another two of their number, but managed to drag down and feast on the Warchanter. With his death, the Legion of Azgorh claimed victory! 

I was pretty impressed with the K'Daai Fireborn unit, as they single-handedly dispatched of the Gruntas, Brutes and Maw-Krusha, showing just how much damage they're capable of inflicting on multiple targets! 

This win left me with a major win, and max kill points. The match ups between each round were, as far as I could tell, random within each bracket. This meant that going into round two, all the players who won their first game went into a random draw. This pitted me against Dion for a battle of the ages against a bitter enemy.

Dispossessed!

Thanks for reading, and check back in soon for Game 2! 
Gabe


Sunday, 7 April 2019

#169: Legion of Azgorh Tournament Army List Breakdown

With the Australian Championship Heat 1 behind me, (I'm slowly learning that it may be ill-advised to explain all of my tricks and weaknesses BEFORE an event) I thought I'd go into depth on my army list, why I chose the units that I chose, and how they performed compared to how I expected them to perform. As the battle reports come out, I'll also touch on different aspects of the army, as well as what worked and what didn't

So, why Chaos Dwarfs, firstly.

There's no question that Chaos Dwarfs are among the rarest armies around (mostly due to price and ease of access), and usually if you don't see an army lots, it's a pretty good indicator that it's not great; not always, but generally. But after reading over the... *sigh*... PDF (my gaming group will remind me every fifteen minutes or so that it's not actually a Battletome), I started seeing a lot of units that I liked the look of, and a playstyle that sounded like a hell of a lot of fun! The more I looked into the army, the more interested I became, and after picking up a whole shoebox of Forgeworld goodness, I was committed. I began ordering, building and painting, spending hours and hours painstakingly putting all of those resin models together to try and form a cohesive army.

And here's what I came up with.

Allegiance: Legion of Azgorh

Leaders:
Bull Centaur Taur'ruk
 - General
 - Trait: Grotesque
 - Artefact: Armour of Bazherak the Cruel
Daemonsmith
 - Darkforged Weapon
Chaos Sorcerer Lord
 - Mount: Steed
 - Runestaff
 - Allies

Battleline:
10 Infernal Guard Fireglaives
20 Infernal Guard Fireglaives

Units:
12 K'Daai Fireborn
10 Chaos Warhounds
 - Allies
10 Chaos Warhounds
 - Allies

War Machines:
Magma Cannon
Magma Cannon
Skullcracker War Engine

Total: 1940
Extra Command Points: 1
Allies: 320/400
Wounds: 136

So, let's break this all down. We'll start with Battleline. For me, the Fireglaives are by far the best Battleline in the army, because while they're as slow as Ironsworn, they can interact with models up to 20" away, and can kick out an alarming amount of ranged damage. Even doing mortal wounds on unmodified 6's is a huge deal, as it bypasses any number of the negative To Hit modifiers out there. This allows you to put some hurt on a pesky hero that thinks they're safe. In a game where bodies hold objectives, I knew that I needed plenty of boots on the ground. I didn't want to go "horde", so a 20-man unit and two 10-man units gave me three units to use as utility models depending on the scenario. If I needed screens or objective campers, they could do that while still dishing out the damage.

With Battleline sorted, I moved on to Heroes. The Taur'ruk is an easy choice as he's currently very cheap for what he can do. Five Rend -2 Damage 3 attacks will put the hurt on most things, and between Grotesque (-1 to hit in combat), the artefact that gives him a 5++ and Blackshard armour (ignore the first would of each shooting and combat phase), he can prove infuriatingly tough to bring down. All hail the Dairy Queen! 

With only one artefact, my other two Heroes were both very deliberately chosen because they're wizards. With missions being what they are, I wanted to be able to compete in all of them, and so a Daemonsmith and an allies Chaos Sorcerer Lord on Steed made it in. The Daemonsmith is great for 100 points, buffing war machines, lobbing grenades and having one of the best warscroll spells in the game. 


The Chaos Sorcerer Lord was chosen because he's fast on a Steed, and because his spell is a great force multiplier. Both of these factors came into consideration because of my next unit.

12 K'Daai Fireborn

At 480 points for 12, these have fast become a staple in literally every list I write. They off a relatively slow army a fast, running and charging sledgehammer unit with enough bodies, wounds and damage output to clear an objective and score it for themselves. 3" reach on their 60 attacks (each doing D3 damage) means that, in most cases, the whole unit is attacking, and whatever they hit is gonna feel it. The Sorcerer Lord's Daemonic Power spell just makes them better again, giving them precious re-rolls. If the spell doesn't go off, I've always got Oracular Visions in the pocket. Otherwise, it typically gets put on another unit that I need to keep alive. The Sorc Lord also plays the vital role of fast-moving babysitter, able to keep up with the K'Daai and use CP to either get them moving faster with runs, re-roll botched charges or mitigate their mediocre Bravery 6 when things go south. It's like the two were made for each other.

The one thing that the K'Daai lack is any kind of Rend. And while the Taur'ruk offers me some high-quality attacks, I really wanted a hammer piece that I could launch into people and reliably dish out carnage. The Skullcracker War Engine was too good to pass up for 200 points, churning out 4D6 attacks on it's main profile (because, let's be honest here... we're overcharging that engine each and every turn), as well as having decent move and a great save! The challenge I faced was that the model is no longer in production, so I decided the employ the skills of one very talented Blake Kerwick to create me an infernal machine worthy of the legion.
While it's not really a train as such, it's definitely a War Engine, it's definitely imposing, and it doesn't offer me any advantages through modelling. In fact, he's 100% impossible to hide, so he's getting shot up and blasted with magic no matter where he stands (which is ideally deep in enemy lines) He also gives me a nice centrepiece for the army! 

With points starting to run out, I simply couldn't resist the idea of my Daemonsmith babysitting two Magma Cannons. They are hands down one of the scariest artillery pieces in the game. People can handle being shot at with Ballistas. People reeeaaally don't like their -2 to shoot heroes catching a jet of lava from 24" away that ends up doing six flat mortal wounds! I like the magma cannons because there's only one chance of failure. There's no hit or wound roll, and most of the time, your opponent doesn't have an opportunity to stop it either. It doesn't care about modifiers and it doesn't care about shiny armour. All it cares about is turning that Lord- Castellant into a flame-grilled steak from across the board.  
One of my last purchases that I personally believe is essential, either by way of a Battalion or by paying points for it, is a spare command point. This is especially true when it comes to this army, specifically with K'Daai. They have average bravery, but a hefty price tag, and the last thing I want is to take a heap of damage from an alpha strike, and watch the unit melt. Some armies can get away without CP in the first turn, but I don't like to risk it. 

With only 170 points left, I turned once again to the Allies pool, and started flicking through warscrolls available to me, looking for a unit that did something that my army didn't already.

Speed and cheap bodies.

And that's when I settled on the humble Chaos Warhound. With a 6+ save and Bravery 4, they are the definition of sub-par, but they're cheap, expendable, insanely fast (at least by Dwarf standards) and give me 20 bodies that I can willingly put in harm's way in order to protect my far more valuable elements. Having 20 bodies with a decent footprint and a 16" run move plays a huge part in objective play, and also gets in the way of your opponent's perfectly planned offensive push that would otherwise be slamming into your Fireglaives. They were a bit of a left field choice, but turned out to play a huge part in board control and objective play. 

So, now that I've gone over the units, lets talk about the elephant in the room. This is a 12-drop army. The decision on who goes first is never going to be in my hands, realistically. And I'm OK with that. I think that unless you can get under 4-5 drops, it's not worth worrying about, and you should instead have contingencies in your army that have an effective turn one, regardless of who goes first. I got to the point where I had about 9-10 drops, and I just stopped caring, instead choosing to just take the units that I really wanted in the army. It ended up not even being an issue at the Heat 1 anyway, as the highest drop army I faced was 6. I just chose not to stress about that. I see that decision of who takes first turn as another opportunity for my opponent to make a mistake. Because my army has such a blend of bodies, speed, shooting and combat, it allows me to at least try and salvage a bad situation, and capitalise on a good one early in the game. 

The army as a whole is quite resilient, thanks to decent saves on even my foot soldiers, and Blackshard Armour, which doesn't sound that impactful on paper, but has huge ramifications. I have enough units that I felt like I could react in both deployment (as I would be able to see where my hammers, heroes or artillery were going to be most impactful) and in the movement phase itself. The Taur'ruk often played the role of either tanking a unit that I didn't want hitting my riflemen, or assassinating an important target. The Skullcracker on a 3+ save, often with Visions on him from the Sorc Lord, was tough as nails, and racked up quite the kill count over the weekend.

And I cannot speak highly enough of the big unit of K'Daai. When you move the unit with purpose and support, using charges and pile-ins to traverse the board, planning turns ahead about where you want them to be, it has such a catastrophic impact on your opponent's army that it can swing the flow of an entire battle. Their 3" reach also means that the unit can string out and hit 3-4 enemy units without sacrificing any attacks. Even units behind screens aren't safe, unless the opposing general is particularly savvy with his model placement. They are the heart and soul of the army, and have rightfully earned their place in my list with blood.

Lots and lots of blood. 

So, there you have it. That's the army that I took to Heat 1, and managed to land 2nd place! I'll be posting up all five battle reports from the event over the next little while, so keep an eye out for that!

Until next time, thanks for reading.

Gabe

Saturday, 30 March 2019

#168: Cancon Game 6 Battle Report - Beasts of Chaos Vs Legion of Blood

After suffering three losses to only two wins, my goal going into the last game was to simply break even. If I could land a win in the last round, it would finish my weekend off on a high, and I was all about that. I arrived at my table to discover that my opponent was Evie, a familiar face around the Brisbane scene, though we had never actually played.

I knew she was an avid Death player, and I asked the dreaded question.

"How many Grimghast Reapers do you have?".

"None."

Well, alright then...

Eschewing the trends of most of the other death players at CanCon, Evie had built a Legion of Blood army based around Bravery bombing and debuffing, using her array of characters.

Allegiance: Legion of Blood
Mortal Realm: Aqshy

Leaders
Neferata Mortarch Of Blood (400) - General
Vampire Lord On Zombie Dragon (440) - Deathlance & Shield & Chalice - Artefact : Ignax's Scales Coven Throne (260)
Kurdoss Valentian, the Craven King (220) - Allies
Tomb Banshee (80) - Allies

Units
40 x Skeleton Warriors (280) - Ancient Blades
5 x Dire Wolves (60)

Endless Spells
Chronomantic Cogs (60)
Soulsnare Shackles (20)
Quicksilver Swords (20)

Total: 1900 / 2000
Extra Command Points: 2
Allies: 300 / 400

The scenario was Focal Points, which is hands down my favourite of the latest set, being a very dynamic and tactical challenge that most armies can compete in to some degree.
Despite how much the first turn rush had betrayed me (or was it my own foolishness...), i chose to take first turn, in order to get bodies on objectives as early as possible. The first order of business was moving up the Spawn and Ungor Raiders, as that would dictate where my main push was. While the Ungor casually strolled onto the central objective thanks to their pre-game move, the Spawn had clearly taken one too many energy drinks, as both of the blasted across the table at breakneck speed! 
Finding myself in a position to use the Gavespawn command ability to its fullest extent, I commited my army in its entirety, with devastating results for my opponent. Facing the full might of fifty Bestigor and the Enlightened, the Skeleton shield wall crumbled and the Dogs were slaughtered. Leaving her with a dozen or so skeletons, and barely any surviving dogs, I'd guaranteed myself a huge numbers advantage. I capped all five objectives in turn one, giving me a grand head start! 
The big unit of 30 Bestigor was the target of most of Evie's incoming damage. Keen to save her Skeletons from imminent death (again?), the Bestigor suffered some pretty horrific Bravery penalties before getting screamed at, and losing a decent number. Despite their casualties and the replenishment of the Skeleton unit, the Bestigor still held a numerical advantage on the objective, and denied my opponent the objective. The Vampire Lord on Zombie Dragon slammed into the other unit of Bestigor, causing some real carnage, and taking a negligible amount of damage in return. However, despite her best efforts, Evie wasn't able to claim back any objectives! 
Having dealt with the bulk of Evie's army, with the Enlightened cleaning up the last of the dogs on the right flank, I was in a commanding position on the table, but was also now suffering some pretty serious debuffs. Neferata had made sure that my embattled Bestigor on the left objective had their hit roll dropped through the floor, but even then, they managed to put out some pretty serious damage. With some tough as nails characters left on the board (including a Coven Throne that spent the rest of the game Beguiling my Enlightened), I changed gears into the avoidance game, retreating out of combat wherever I could, and spreading out my units to make sure that objectives were safe. Above, despite the Ungors meeting a predictably bloody end at the hands of the Zombie Dragon, my Spawn and Shaggoth were both in range of the objective, meaning that Evie would have to kill both in order to claim it. Not an impossible task, but it was highly unlikely to only take a single turn, which would buy me some valuable scoring time. 

I was also pretty confident that, even if she did manage to kill my heroes, there was a good chance that I'd generate a spawn from their death, buying me an entire extra turn of objective denial.

At the end of turn two, I'd managed to forge a 16-1 lead, managing to cap all five objectives for two turns in a row. 
Having crippled the Enlightened with Beguile, the Coven Throne got some help from Neferata to butcher the enraptured birds, taking back the home objective. The Tzaangor Shaman also met a terrible end, and then rolled a 1 to generate a Spawn. It wasn't to be!
The Zombie Dragon had remained pretty much unchecked on his rampage across the table, and with the scoreboard running away from Neferata, Evie turned her attention to killing as much as she could. And kill, she did. The Zombie Dragon ignored the Shaggoth, and instead launched headlong into the Bray-Shaman and Ungor sitting on my deep objective, slaying all in her path and healing on the way. The Bray Shaman did what he was meant to and generated a Spawn, denying the Vampire Lord the objective once more, while the Spawn on the left of the photo above moved around to get within range of the objective in the following turn, stacking two bodies on it.

At this point, my opponent conceded, due to some factors outside the event. While I had suffered horrific losses, and hadn't managed to dent any of the big pieces, I had rampaged away on the scoreboard, creating a lead that could not be caught. Evie was great to play, and I'd happily play her again. 

So, there it was. The event was wrapped up, and after a disaster of a Saturday, I'd redeemed myself to a degree on the Sunday, finishing the event with three Major Wins and three Major Losses. I was stoked to have played six people that I'd never faced before, and over the course of the event, I got to meet a ton of really cool people from all over the country. It was great to meet (and play) people from different states and different gaming clubs (got to meet all the lads from Measured Gaming, as well as the legend that is Doom and Darkness). It was a great event for the community, and I feel like, certainly from my experience, that it was a really unifying event for the national community. 

Overall, I finished 88th out of 196 players, which I was alright with. Going into it, I had pretty high hopes of cracking the top fifty, but it's easy to forget that almost every top-tier player in the country was there too, crushing skulls and taking names. I did walk away with one of only Coolest Army Nominations for my Beasts of Chaos, which I equal parts thrilled with and stunned by. Anyone who was following my Road to CanCon knows what a scramble it was to finish that army, but I think that a striking colour scheme partnered with conversions throughout helped it to stand out from the crowd. 

Once again, thanks to all six of my opponents. You were all a delight to play. 

This was my first CanCon, and I'll definitely be going back next year! 

Until next time,
Gabe

Tuesday, 19 February 2019

#165: CanCon Game 3 Battle Report - Beasts of Chaos Vs. Maggotkin of Nurgle

So, going into Game Three, I was sitting on a major win and a major loss. The world was still my oyster, and depending on how my third game went, I could still set myself up for a good final placing.

At the same time, taking a loss had changed my approach to games, as I knew I wasn't playing for sheep stations. This let me relax a bit and really enjoy my next four games.

Now, I must apologise to my opponent, because I was well and truly spent going into my third game. Between the heat and hours of concentration, I was beginning to fade. Knowing this, I was hoping for a pretty straight forward game, win or lose.

And, well... This is what I came up against.

Allegiance: Nurgle
Mortal Realm: Ghyran

Leaders
Lord of Afflictions (220) - General - Trait: Avalanche of Rotten Flesh - Artefact: Rustfang
The Glottkin (420)
Harbinger of Decay (160)
Festus the Leechlord (140)

Units
40 x Chaos Marauders (200) - Axes & Shields - Tribal Banner - Damned Icon - Mark of Nurgle
20 x Chaos Marauders (120) - Axes & Shields - Tribal Banner - Damned Icon - Mark of Nurgle
6 x Plague Drones (400)

Endless Spells
Geminids of Uhl-Gysh (40)

Total: 1900 / 2000
Extra Command Points: 2
Allies: 0 / 400

I had serious concerns as soon as I saw the list. My opponent, Dalton, could match me on bodies, and while he didn't have the raw killing power that I did, he certainly had the staying power and endurance to turn the game into a war of attrition. And a war of attrition is something Beasts of Chaos want no part of.

My mind was somewhat put at ease, however, when my opponent cracked about six dad jokes in the first five minutes of our game. So, I knew that it was going to be a fun game, no matter what. This was good because high-model-count attrition armies can easily lean toward a somewhat uninteractive experience. But my opponent made it pretty clear from the start that he was there for a good time, and that's exactly what we had.

The Scenario was Border War, which I was indifferent about. On one hand, Dalton could flood the middle of the board with incredibly durable units, and they would be very difficult to shift. On the other hand, he would have to come to me in order to compete on the scenario. I knew I had a task before me, but knowing that his army became a lot more durable after having a hero phase, I took first turn, threw caution to the wind and launched into action.

I was seriously second guessing myself on whether to move up and screen onto the objectives, or to launch across the board and try to rack up the kill count on Marauders early on to give myself a numbers advantage. Thanks to a gung-ho attitude, and judgement clouded by exhaustion, I charged.
The Bestigor went in and started swinging. Unfortunately for me, Glottkin's aura dropped their To Hit roll, and I didn't do nearly enough damage. I'd managed to hack my way through a fair chunk of them, but I knew the counter punch was going to hurt. On the bright side, I took both middle objectives and started posting some healthy numbers.
In response to the initial onslaught, Dalton pulled out all the stops to deliver some devastating blows. Thanks to a hole I had cut in the Marauders, the six Plague Drones had enough space to charge into the back of my Bestigor. And while they didn't have much in the way of Rend, they did have an avalanche of attacks, and the magical support of Festus, who made sure that armour corroded almost as fast as it was pierced. After battleshock, a single Bestigor stood boldy (boldly? Is that what we're calling it?) against the stinking masses. 
On the other side of the table, my Shaggoth was hacking his way through the other unit of forty Marauders, while my second unit of Bestigor attacked the other end. But no matter how hard I tried, he seemed to outnumber me on every objective. Scoring all four objectives for two back to back turns really put the nails in the coffin for me. 
In a last hurrah, my Doombull charged in and hacked the Lord of Afflictions to pieces, but by then it was too late. Dalton had outplayed and outmanoeuvred me. He pulled casualties out of the perfect places and piled in with precision, earning him a well-deserved major win. 

I think Dalton probably had this game from the start. Had I been a bit more cagey, I probably could have stayed in the game a little longer, but I just couldn't get through the bodies. The Harbinger of Decay was vital to keeping his horde alive, and it was a small mercy that the Glottkin failed every attempt of Fleshy Abundance. As it was, I felt like a lot of my units died cheaply, going down without killing much in return. That said, I played Nurgle for quite some time and that's exactly how they win games. 

Get onto the objectives.

Don't die. 

Dalton was a legend to play, and I couldn't fault his sportsmanship or gameplay.

This left me on one major win and two major losses, which wasn't where I wanted to be. My goal was to at least break even with wins and losses, and that was not looking good at this point. I was going to have to pull out something special on the Sunday to salvage some glory! 

Check in soon to find out ;)

Thanks for reading, 
Gabe

Sunday, 10 February 2019

#164: CanCon Game 2 Battle Report - Beasts of Chaos Vs. Legions of Nagash

Coming off a squeaky win in Round One of CanCon, I knew that I was going to be in the thick of it with all the other winners. I was hoping to come up against another player who had scraped a win, and get a favourable matchup. This was not to be.

When I arrived at my table, I was both overjoyed and filled with dread. I was facing Michael "Rockhampton" Thompson. Fantastic! He's a top bloke, and I'd been to several events where we had never ended up facing. The dread part came from his army list...

Allegiance: Grand Host of Nagash
Mortal Realm: Not Specified

Leaders
Nagash Supreme Lord Of The Undead (800) - General
Necromancer (110)
Guardian of Souls with Mortality Glass (140) - Artefact: Balefire Lantern

Units
5 x Dire Wolves (60)
30 x Grimghast Reapers (360)
20 x Grimghast Reapers (280)

Endless Spells
Quicksilver Swords (20)
Umbral Spellportal (60)

Total: 1950 / 2000
Extra Command Points: 1
Allies: 0 / 400

 Now, I'd played a lot of practice games against mass Reapers, and it was a hard slog. I knew that I was gonna be in for a brutal fight, and that the odds were against me, but the scenario was A Better Part of Valour. That was my glimmer of hope. I had an army that could potentially rush across the board and burn objectives from under Michael's nose. And when that idea crossed my mind, i locked into that battle plan!
Basing my game plan around the questionable strategy called "Fools Rush In", I launched my entire army across the table in an attempt to get the jump on Michael before Nagahs could debuff my army into the dirt. Now, I think I made a critical error in taking first turn, as I could have easily wasted Michael's first turn and still gotten the same results. I would have been outside of most of Nagash's spells, and wouldn't have been risking a double turn coming back at me. But hindsight is a beautiful thing. My Spawn both made mammoth runs (16" and 17" on 3d6), and I charged on in, dropping CP left, right and centre. 

Where I think I went wrong was in taking on both units at once. I really should have launched both Bestigor into one unit of Reapers, flooded the objective, and burnt it. As it was, I managed to kill a fair few Reapers out of both units, but not enough to cap either objective. 
My one saving grace was on my left flank. I managed to launch up the board with my Enlightened, and blend a few dogs to burn Michael's objective on my left. I was careful to approach the dogs from the far end, as the Guardian of Souls with Mortality Glass is a hero I've had experience facing. His charge debuff is crippling, so I made sure to stay outside of 9" of him in my charge phase. 
At this point, I'd fully realised the series of mistakes that I'd made, as Michael claimed a double turn, and put down a monumental chunk of my army. Both units of Bestigor had melted, Spawn were popping everywhere, and the inevitable march on my objectives began.
The highlight of the game came when Nagash popped a Spellportal up next to my Shaggoth and turned him to ash! To add insult to injury, he rolled a 1 when trying to turn into a Spawn. Oh, dear...

The rest of the game was largely one-sided, as I'd lost all of my heavy hitters and was now faced with a wall of Reapers clearing the table of Beasts. Michael ended up claiming a crushing Major Victory with 1900 Kill Points. 

So, where did it all go wrong? 

I think it's easy to hide behind the "bad matchup" and not take responsibility for mistakes, because I've got to be blunt... I made a few. I think there was definitely an avenue down which I could have gone that could end in victory. Sending the Bestigor in at all in the early game was a bit of a waste, as they didn't achieve anything other than dying. I made the right call sending the Discs in on the left flank and burning the objective from under the dogs, but I should have sent only them in, and kept my hammers back for later in the game, when I could summon in more bodies. This would have left a powerful unit in the Discs on a tactically unimportant flank, not worth committing huge resources to killing as they didn't have an objective, but impossible to ignore. Their speed and killing power makes them a huge threat. I went about this scenario wrong and it showed.

Now, despite all my hindsight and newfound tactical acumen in the light of my mistakes, I don't want to take anything away from my opponent. He flat out beat me fair and square, took full advantage of my mistakes, and played the scenario to perfection. To put it in perspective, Michael went on to podium the event, so at no point was his skill or strength on the table in question. 

It was a hilarious game from start to finish, and I'd play Michael again in a heartbeat.

This left me on one major win and one major loss going into Round Three, where I faced one of the gentlemen from Measured Gaming! Catch you then for another Battle Report.

Thanks for reading, 
Gabe

Sunday, 3 February 2019

#163: CanCon Game 1 Battle Report - Beasts of Chaos VS. Blades of Khorne

Well, the day had finally arrived. CanCon was upon us, and I was ready to begin my meteoric rise through the ranks. Hopefully...

But probably not...

To throw a complete curveball at me round one, the random draw pitched my Beasts of Chaos against none other than Vorgaroth the Scarred and his mighty dragon, Skalok, the Skull Host of Khorne.

The big...

Khorne...

Dragon.

I'd had some experience facing those big hammer pieces like Skarbrand and such, but Vorgaroth is truly in a league of his own! 1200 points of unbridled aggression and unresolved issues regarding self-control and moderation. The scenario was Three Places of Power, and after quickly assessing my options, I came up with only two.

#1: Throw my entire army at the Dragon and try to kill it.

#2: Ignore the Dragon as much as I could, steamroll as many of his little units as I could, and try and live long enough to get ahead on objectives.

And since I enjoy pretending my problems don't exist as much as the next person, I went with option two. I had a huge number of cheap disposable units, and given how immense the base of this model was, I was confident in zoning him into a position where he couldn't really spread his wings (pun fully intended) and go for what he wanted.

My opponent, Michael, was running this list.

Allegiance: Khorne
Mortal Realm: Ulgu

Leaders
Vorgaroth the Scarred & Skalok the Skull Host of Khorne (1200)
Lord of Khorne on Juggernaut (140) - General - Trait: Violent Urgency - Artefact: Talisman of the Watcher
Slaughterpriest (100)
Slaughterpriest with Hackblade and Wrathhammer (100)
Bloodstoker (80)

Units
10 x Bloodreavers (70) - Reaver Blades
1 x Chaos Warshrine (160)

1990

As you can see, he'd built the army with one goal, and one goal only. Buff up the Dragon and send it into a planet's worth of people to rack up that kill count.
Knowing that my whole army was on borrowed time, and having the decision of first turn, I chose to go first, and get points on the board as quickly as I could. I knew if the dragon got onto an objective, there would be no getting him off. The Tzaangor Shaman took up residence on the right objective, the Doombull on the left, and the Shaggoth took up residence on the central objective. Unfortunateley for me, I didn't quite get the run rolls I was hoping for with the Bestigor, and couldn't get a screen around him, but it was going to have to do! 
Having capped all three objectives, all I could do was hope for the best. But the sheer power of the dragon quickly became apparent. Between Blood Boils from the Priests and the White-Hot Balefire from the Dragon, my Shaggoth (along with the Aetherquartz Broach) dissolved into oblivion, but I did manage to pop a Spawn out of him, and tag the Dragon in combat, preventing him from charging where he wanted. Despite this cheeky move, he still managed to pile in around the newly created Spawn and kill all 30 Bestigor in one round of combat!

While the damage to my army in the initial clash had been catastrophic, I was not out of the fight yet!

In a stroke of pure luck, I won priority going into turn two, and I knew I had to make the most of it! 
I was coming into a play style that I absolutely love playing. I was facing an impossible task, with the tiniest glimpse of hope, and I had to shift into a gear I like to call "All Losses Are Acceptable Losses".

With the central objective vacant, my Bray Shaman left the relative safety of the Herdstone to make a massive run onto the objective. His accompanying Ungor, originally destined for the charcoal barbeque lit under the Herdstone, gladly embraced the new career trajectory of being a meat shield between their frail overlord and an angry dragon the size of a small building! 

My 20-Strong Bestigors decided that the best defence was a good offence, and careened into the two units of Reavers on my left side. Bestigor did what they were designed to do and butchered everyone in sight. It fed my opponent Blood Tithes, but possible victory comes at a price. On the other side of the table, my Enlightened flew into Michael's back lines, pulverising the other 10 Reavers, leaving him with nothing but a Warshrine and Heroes. 

From this point on, my sole focus was to screen and block. With the Dragon's base being as large as it was, all I was trying to do was give it nowhere to jump, and to force it into charging and fighting things like Spawn and Ungor, rather than my hammer units, or (more importantly) my Heroes on the objectives. 
 For the next two turns, this is exactly what I did. Over time, the Bestigor fell, as did the Tzaangor Shaman and Great Bray-Shaman, but not before they had established a lead on the scoreboard. The Enlightened had been largely uncontested, but when they turned their attention to the Warshrine, they in turn attracted the ire of some raging lunatics. Once again, Blood Boils and Balefire took their toll and wiped out the Tzeentchian birdpersons.

At this point in the game, I had one chance at a win. Because of the mayhem that had unfolded on the right side of the board, my Doombull had largely avoided any conflict and stood on full wounds, racking up a hefty score. With Khorne now holding two objectives, my only hope was to keep the Bull alive for the entire game, which would give me a final score that could not be surpassed by my opponent. With that in mind, I placed Spawn and Ungor in such a way that the Khorne Dragon would not have the movement to get over the top of my line, and wouldn't have the range on his Balefire to hit the Doombull.

Seeing an opportunity to put the Beasts down for good, he enacted a tactically savvy play...
Popping his Blood Tithe to move his Lord on Juggernaut in the Hero Phase, he managed to weave between my screens, before using his normal move to get to within a reasonable charge distance of my Doombull. He was buffed up to the nines by the Stoker and the Priests, and while they took the fight to the three remaining Ungor, the Lord of Khorne was after a mightier skull for his trophy rack! 

I was optimistic about the impending combat, as there was a good chance the Lord wouldn't cut through 8 wounds in a phase, (and the Mutating Gnarlblade would have a fair crack at killing him back) but stranger things have happened, and it was quite possible. Alas, we would never find out, as he failed the charge, finding himself out of combat and off the objective. 
In my final turn, I retreated with the two Ungor that had somehow survived combat with the Khorne Heroes, (in no small part thanks to the now-immense aura emitted by the Herdstone that allowed me to ignore Battleshock) and launched an assault on the Jugger-Lord with some newly summoned Bestigor. In retaliation, the dying moments of the game led to the deaths of all of my models bar the Doombull, who stood battered but triumphant on three measly wounds. 

A Major Victory, but paid for with blood. 

I was stoked to be starting my CanCon campaign out with a big win. I didn't get much in the way of kill points, claiming only three units of Reavers and a Jugger Lord, but I knew going in that I wasn't going to have a huge tally, as such a huge portion of Michael's army was tied up in one model. 

In the end, I think my movement phase and the favour of Lady Luck won the game for me. I was able to restrict the Dragon's movement down to one half of the board, and strongly encourage it to fight insignificant units while I racked up a healthy lead on the scoreboard. It was a very close game, however, and at any time, it could have turned on its head and become a catastrophic loss. 

But regardless of the outcome, it was great to finally play against the Khorne Dragon, and we had countless people stop past the table just to bask in the sheer magnitude of the model!  

My opponent, Michael, was an absolute gentleman, and we both laughed off the Game One nerves to have a really tactical game! 

In Game Two, I face another Michael and his Grand Host of Nagash, so keep an eye out for that on the Facebook Page! 

Until then, thanks for reading.
Gabe

Sunday, 25 November 2018

#160: RCGT Game 4 Battle Report - Maggotkin of Nurgle Vs. Stormcast Eternals - Three Places of Arcane Power

After finishing the first day of the tournament on three major wins and a healthy pool of kill points, I knew I was going to have a tough run on day two up in the nosebleed section! And just as Lady Luck had favoured me in round one, taking on a Gautfyre in Total Commitment, so she had turned her back on me in round four, as I took on a Sacrosanct Chamber in Three Places of Arcane Power.

My opponent was fielding...

Stormcast Eternals from the mortal realm of Ghur:

Lord-Arcanum on Gryph-Charger (General, Staunch Defender, Gryph-Feather Charm, Wind Runner)
Lord Castellant
Lord Relictor
Knight Vexillor (Pennant of the Stormbringer)
Knight Incantor (Mindlock Staff)
Knight Incantor
10 Sequitors (Battleline)
5 Sequitors (Battleline)
10 Evocators
10 Evocators
Cleansing Phalanx (Warscroll Battalion)
Soulsnare Shackles (Endless Spell)

Straight away, I knew that I was in for a rough ride. One of the main weaknesses of my list was an almost complete lack of rend. And if there's one thing Stormcast do incredibly well, it's really good re-rollable armour saves! And with a huge amount of area terrain on the table, it was going to be a grind. Uh-Oh...
Deployment was a tricky one, as I had to decide early on how I wanted to play this. I knew that I didn't have enough in my army to contest all three, so decided to leave the right hand objective to the Stormcast, and instead focus all my attention on the left and centre objectives. 

Unfortunately for me, my opponent Adam outdropped me, and had a very decisive first turn. Between the Scions of the Storm, the Vexillor and some magnificent run rolls, he'd managed to get all three objectives locked down with multiple units, screening his wizards with Sequitors. All of his buffs went off pretty reliably, and thanks to Cleansing Phalanx, the Sequitors were re-rolling just about everything. It was at this point, very early on in the game, that I accepted that I'd lost. Having looked over the list the night before, and how all the rules interacted with each other, I knew I wasn't going to be killing a lot, and it was going to come down to who got onto objectives first and could hold out.

I knew that as soon as Adam got ahead on the scoreboard, I wasn't going to catch him, but I was determined to still give him a hard-fought game! The last thing I wanted to do was pack it in and deny him a full-length game purely because I was going to lose. So, in true Nurgley fashion, my army ground forward and started throwing punches. Both of us were playing for kill points from that point forward, as they were the secondary tie breakers at this event! 
 I launched an all-out assault on the left objective, with the Lord of Afflictions and Pusgoyles careening across the battlefield to try and kill the Arcanum and Incantor claiming the objective. The Jabberslythe slammed into the other end of the Sequitor unit, leaving many unable to fight. The ones that could fight didn't particularly want to either, as Jabberslythes have a habit of going 'POP!'. Being wholly within cover and Staunch Defender meant that nothing was dying in a hurry, but in return, the Pusgoyles proved their toughness by taking an immense amount of punishment for very little reward! Festus lurked nearby in hopes of stripping their armour saves off, but in the face of such arcane mastery, it was very difficult to get any of my spells off.


The centre was a much tougher situation to get to grips with. The Sequitors had zoned out the front of the terrain, making it all but impossible to even get within range of the objective with my GUO. He slammed into the front rank, being confident in his ability to shrug off most damage. This proved to be less reliable than I originally had planned, as the Greatmaces made their presence known and pummelled him for ten wounds! My second Jabberslythe went into his Evocators, and my eyes lit up! Their damage output is insane, and they were about to do a great deal of damage to themselves. The weapons inflicted six wounds, which bounced a couple of mortal wounds back. Then Adam wound up for the big zap, before I informed him that (at the time), you could suffer mortals from excess wounds inflicted on the Jabber. Luckily for him, the Celestial Lightning Arc is an ability, and not an attack profile, meaning he didn't have to use it if he didn't want to. In a very wise move, he chose to refrain from using it, and avoided any backlash from the damage.

From this point onward, it turned into an absolute bloodbath. The central Jabberslythe was cut down by the less valuable Sequitors, while the Evocators on the right flank left their objective in the capable hands of an Incantor, leaving them free to carve their way through the Blight Kings.

The brawl on the left was a real battle of attrition, where I just didn't seem to be able to bring down any of the heroes. On the last turn of the game (only turn three, mind you, as was a common theme with the clock being what it was), I was hoping for a priority win,which would have given me the opportunity to retreat with the wouned LoA and the one surviving Pusgoyle, conserving well over 600 kill points, but it wasn't to be. Before they could fly away, they were cut down by mace and spell.

This game ended in a crushing defeat on my part, but was still a really enjoyable game. My opponent was great to play against, and I felt like we had a very clean, concise game, both being very deliberate to declare intent and so on. I didn't really use my Plaguebearers at all in this game, which was a bit wasteful, but then there really wasn't a lot they would have done considering the scenario.

With three major wins, a major loss and two games played up on Table One, I was pretty happy with my performance so far. But the weekend wasn't over yet, and I dropped down to Table 3 to face off against yet another formidable opponent!

Thanks for reading,
Gabe

Sunday, 18 November 2018

#159: RCGT Game Three - Maggotkin of Nurgle Vs. Kharadron Overlords 2500pts

Coming off the back of two big wins in my first round, I somehow found myself in unfamiliar territory.

Table One.

And I found myself facing down against my second Duardin horde of the day in the form of Ben's Kharadron Overlords!

Barak-Urbaz
Arkanaut Admiral (General, Doughty Champion, Ignax's Scales)
Aether-Khemist (Aethershock Earburster)
Aether-Khemist
Aetheric Navigator
10 Arkanaut Company (Battleline, Light Skyhooks)
10 Arkanaut Company (Battleline, Aethermatic Volley Guns)
10 Arkanaut Company (Battleline, Skypikes)
10 Grundstok Thunderers
9 Endrinriggers
40 Dwarf Warriors (Allies)
Arkanaut Frigate (The Last Word)
Arkanaut Frigate (Prudency Chutes)
Iron Sky Squadron (Warscroll Battalion)

The scenario was Shifting Objectives, which was totally alright by me! Playing down the length of the table, meant that my Plaguebearers could screen and tie up anything my opponent could throw at me, and that I didn't have anything in my backfield to sit on. I could push up my whole army and apply an immense amount of pressure. The matchup was also heavily in my favour, as Nurgle is not traditionally known for being vulnerable to shooting. With my Lord of Blights stocked up with command points, I was confident in making things difficult to kill for the pesky Duardin!

With that said, I've also played a grand total of one game against KO, and that was against a Zilfin Clown Car list, so I wasn't 100% sure of what everything was capable of. I knew Endrinriggers needed to die ASAP, and that I very outnumbered. For the third game in the day, it was going to take all my focus to make sure I didn't do anything silly. Nothing... silly...

With the scenarios being all about numbers on objectives, I was determined to give myself the best possible chance at success. My opponent chose to give me first turn, which I took gladly! Thanks to the Bell and a healthy run roll, I managed to push up onto all three objectives with my two Plaguebearer units and my Blight Kings on the right. My GUO waddled up behind the main line, conscious of the damage output the Arkanauts were capable of.

The Lord of Blights (who, with his whopping 21" range, was lurking deep in my deployment zone) dropped a Cloud of Flies on both Plaguebearer units, meaning that they would be -2 to hit in combat and -4 to hit in shooting. I was hyper aggressive with the Jabberslythes, so as to draw fire away from my important stuff, an the LoA & Friends sat just behind my frontline to react to threats. The frigate on my right was packed with Thunderers, Endrinriggers and heroes, and I knew that I needed a counterpunch ready for when all the Duardin spilled out, guns blazing.
I think my opponent made a mistake giving me first turn, as it allowed me to lay claim to all three objectives and get all my buffs up, but he wasn't about to lie down without a bloody fight! 
 In his second turn turn, he pushed forward with everything! Both ships disgorged their cargo. The Endrinriggers launched out of their ship, and butchered the Blight Kings in a truly horrifying display of combat prowess, where on the left flank, the Skypike Company piled out and fired their pistols harmlessly into the Plaguebearers. While the GUO took some damage from Skypikes, my army was othewise pretty unscathed. The Jabberslythes did their job, drawing a truly terrifying amount of fire and exploding with impunity so that my buff pieces and combat threats could live! Ben claimed the right objective with the Riggers, bringing the turn one score to 5-1 in my favour; a great start to things.
On the left, my opponent charged his frigate onto the objective, and didn't charge in with his Dwarf Warriors in the middle. The Frigate, having such a large base and no real combat threat, meant that the Duardin physically didn't have the space to outnumber me on that objective. The Warriors would not have killed many of the buffed up plaguebearers, but they would have outnumbered them significantly thanks to their smaller bases. As it were, I still held both. 
 A cheeky double turn from T2 to T3, not only allowed the Pusgoyles an opportunity to down a Frigate, killing some of the Thunderer's on board, but also gave them positioning to launch over the ruins and slay all the Riggers, which were my biggest combat threat! In my haste and state of exhaustion, I completely forgot to physically move the models when I piled in, leaving only two models in range of the objective. In a sheer stroke of luck, the Thunderers and Arkanauts threatening the right objective were just outside of 6", meaning that my mistake didn't cost me dearly, as the right objective had become the important one! Phew!
 Making sure that he wouldn't miss out on points, my opponent strolled forward with both the Company with Aethermatic Volley Guns and the Thunderers. With a little help from the Witherstave on the LoA lurking in the ruins, their barrage of firepower inflicted a single wound. It was no fault of my opponent; both of us were in a bit of disbelief as Lady Luck well and truly deserted him! In some consolation, he was able to move up with his Company to outnumber me and claim the objective.

At the end of Turn 3, the score was 14-4 in my favour. The schedule, which had been responsible for many players failing to get past turn three across the weekend,  reared its head most prominently in this game, as we didn't get a chance at turn four or five, but with a 10 point lead, I managed to land a third major win for the day.

I think this was a bit of a mixed bag for my opponent. On one hand, he drew against probably the most defensive, anti-shooting army at the event, which crippled his ability to touch the big blocks of infantry sitting on the objectives. This was probably the one army he didn't fancy fighting. On the other hand, I was on the edge of my seat the entire game, knowing full well that, at any point, he could charge in with his infantry, flood the objectives with his superior numbers, and be safe in the knowledge that Plaguebearers couldn't fight their way out of a soggy paper bag.

The Blightkings melted to the Endrinrigger assault, but my Pusgoyles were left relatively unscathed and unchecked to rampage their way across the board. Once again, Nurgle did what they do best, and that's getting onto objectives and refusing to die.

This left me on three major wins from three games, and cemented my spot at the high end of the scoreboard going into Day Two. But I knew my toughest games were ahead of me...

I'll be posting all about Day Two of the event soon, so keep an eye out!

Thanks for reading,
Gabe


Sunday, 14 October 2018

#144: RCGT Game 2 - Maggotkin of Nurgle Vs. Dispossessed 2500pts - Focal Points

Coming off a big (and frankly, downright lucky) win in Game One, I really had no idea where I would land when it came to opponents. As it happened, I ended up facing Dion with his Dispossessed horde.

Allegiance: Order
Realm: Ghur

Warden King (General, Anraheir's Claw)
Runelord (Gryph-Feather Charm)
Runelord
Unforged
40 Warriors
30 Warriors
10 Warriors
30 Longbeards
20 Hammerers
20 Ironbreakers
10 Irondrakes
3 Skywardens
3 Skywardens
Grudgebound War Throng (Warscroll Battalion)

The first thing that stands out about this list is the sheer volume of models on the table. With 160+ models in his army, my biggest concern was that we just weren't going to get through our game. We had a really good discussion at the start of the game regarding time management and Dion assured me that he played fast with the army. To my delight, that's exactly what he did. He had movement trays for the larger units, he was decisive with his tactical decisions and he knew the warscrolls inside out; all key elements to playing a smooth and concise game with a horde army.

While I was having dreams about playing this list in Three Places of Arcane Power, which would have leaned heavily in my favour, the mission was Focal Points. With so many high-armour bodies, I was going to have to be quick on my feet!
Knowing full well that I was going to be outdropped, I went with my kneejerk reaction and hid everything behind a wall of Plaguebearers. In hindsight, this was probably a tad over-cautious, as the only thing in my opponent's army that could hit me early were the two flanking units of Skywardens. But the scenario is all about numbers, and I wanted those hard-to-shift bodies up front to flood objectives. My Lord of Afflictions with the Witherstave was nice and central, and the GUO was carefully placed so as to give both Plaguebearer units, the Blight Kings and the Pusgoyles extra movement from his Doomsday Bell. Festus parked on my bottom objective, knowing full well that his spell would be vital in getting through the resilient armour of the duardin. 
Unsurprisingly, my opponent took first turn in hopes of getting onto the objectives before me, but even with the first moves, their short little legs only just got them onto the central objective. At the top of the table, a unit of thirty warriors got onto the objective in the woods, while on the left side, Ironbreakers planted themselves on the objective at the foot of the hill, shielded by the Unforged and Hammerers, who got the available buff from the Runelord nearby. Irondrakes held up rear of his centre line, moving into a position to fire on anyone who got too close. Having taken next to no casualties in turn one, I struck back, and hard. With the exception of the Blight Kings, I pushed up with absolutely everything. The centre (cream-coloured) Plaguebearers, buffed by the Lord of Blights, lurched forward, intent on pushing bodies onto the central objective. My opponent had left a little too much space in front of him, and I was sure I could get Plaguebearers between him and the objective. 

The Pusgoyles had a similar idea. Launching around my right flank, and using the Gnarlmaw for some added speed, they circled the ruins and slammed into the exposed flank of the Warriors. The GUO had used his command ability on the Pusgoyles to give each profile an extra attack, and the Lord of Afflictions was close enough to give them re-roll 1s to hit. Caught between the anvil of -2 To Hit Plaguebearers and some very aggressive flies, the Warriors began to melt. I managed to kill enough to claim the objective, but there were still so... many... dwarfs. 
Seeing a golden opportunity, I launched the Jabberslythe over my army on my left side, and straight into the front of the Hammerers. In a stroke of perfect luck, the Jabberslythe survived on a single wound, meaning that they were still locked in combat with the horrifying monstrosity, but that it caused maximum damage with its Bile Blood. Nine Hammerers were dissolved inside their armour as a result of the damage they had inflicted. Perfect! 
Scoring the cheeky double turn going into turn two, I was keen to keep momentum in my favour. I utilised my very healthy Contagion Point bank to summon a second tree, as well as five Plaguebearers on my back objective, which left the Blight Kings free to go punch on with things. Thanks to the Bell and the tree, they raced across the open ground to hit the three Skywardens threatening my flank. With any luck, I was hoping to draw the Unforged and Hammerers away from my lines, and killing units that would have no real impact on the scoreboard. The Hammerers finally took the last wound off the Jabber, with minimal repercussions. 

At the top of the table, the Skywardens found themselves trapped in a combat that they had no hopes of winning, against a horde of Plaguebearers that, every time they took casualties, would grow them back with a cheeky one on the Battleshock test. Every... single... time...

The other Jabber, seeing what stellar success his comrade had had, decided to barrel toward the Dwarfs and fail a charge. But the real action was in the middle of the table. 

The Pusgoyles, not content with slicing and dicing Warriors, used a sly pile-in to drag the Warden King and Irondrakes into combat with them. With their lack of rend, the Blightlords all but ignored the Warden King, and instead divided their attacks between the Irondrakes and the surviving Warriors, inflicting horrific casualties on both! The scales of battle were tipping in my favour, as I solidified a lead on the scoreboard. 
In a "Just As Planned" moment, my opponent took the bait and sent the Hammerers and Unforged after my Blight Kings. While the Unforged's little legs couldn't quite make the charge he needed, the Hammerers went in and delivered some grudge-settling, splatting Kings left and right, leaving one alive on two wounds. Before they died, though, they did manage to dent the Skywardens. But with them now dead, and the Plaguebearers otherwise indisposed, my back objective was looking awfully weak, and if my opponent could claim it, even for a turn, I was going to be in a real pickle. 
But I had one more trick up my sleeve. My Great Unclean One and Festus managed to draw out both unbind attempts from the Runelords with obviously potent spells, like Curse of the Leper. After successfully shutting them down, Dion found himself in a real spot of bother when the GUO cast Soulsnare shackles with no opposition. The impact was crippling, slowing all the threats to a snail's pace, as well as dishing out some sneaky mortal wounds here and there. 
At the top of the table, things were not going well for my opponent either. Having absolutely butchered their way through a full unit of Warriors and the Irondrakes, the Pusgoyles continued their path of destruction north, tagging another unit of Warriors in tandem with the Jabberslythe. This also pinned the Duardin between two units, stopping them from maximising their output thanks to awkward pile-ins in two different directions. 
As time on the clock ran out, it was apparent to both of us that I'd managed to take a commanding scoreboard lead, and that my position on the battlefield was firm. I'd managed to land another major win, and actually get a sizeable chunk of kill points out of it too! 

The game as a whole was great! We had a few laughs, and I was pleased with how fast my opponent played, considering the army. I think he was a little bit stand-offish with a few of his backline units. You can see in the photo that there was a whole unit in the backfield that never really entered the conflict. I think they would have been well used to either reinforce the top objective or push on the centre if only for a turn to take the objective out of my hands. Once my Plaguebearers got onto that centre objective, I made them as difficult as possible to shift, with their Locus, Witherstave and the Lord of Blights all contributing to their tenacious manner. 

I think baiting the Hammerers away with the Blight Kings saved Festus and his objective, as there would have been little I could do to stop him from getting his bloated head caved in. And I think the Pusgoyles had a dream game, just butchering whatever came within arms reach! They ended up killing 700 points worth of my opponent's army, practically on their own. Standout unit of the game. 

All in all, the army did what it was designed to do. Get onto objectives and never leave. But being on two major wins now, with both offering up plenty of kill points, I found myself going into round three on Table One!

Check in for game three soon! 
Thanks for reading,
Gabe